How to Draw Cheese Step by Step
This easy tutorial shows how to draw piece cheese in just four steps. It includes simple examples and quick drawing tips.
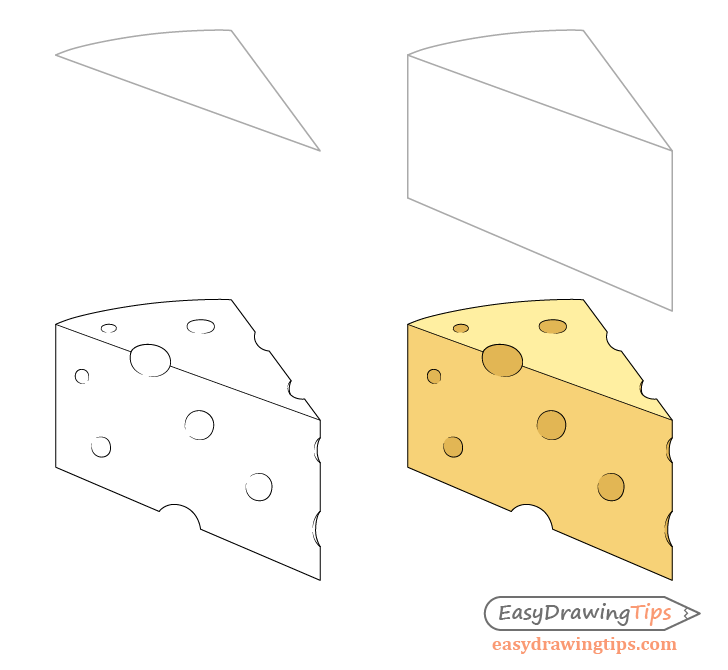
You can see a preview of the drawing steps above. As a piece of cheese is not very difficult to draw this tutorial can be great for beginners.
Start the tutorial in pencil and make light lines as you will need to erase parts of the cheese outline when adding the holes. You can darken your lines later by tracing over them with a black pen or marker.
Step 1 – Draw the Top of the Cheese
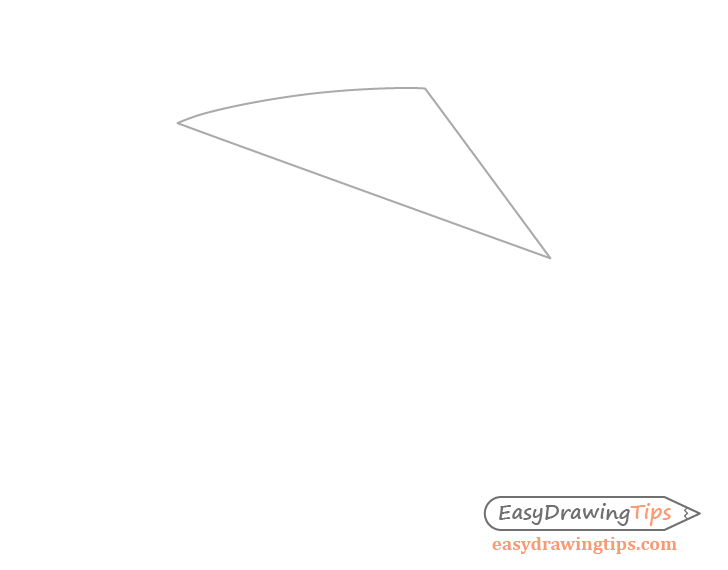
Begin by outlining the top side of the piece of cheese. It’s shape should be similar to a triangle but with a slight curve on one of the sides (the one that will be the back of the piece of cheese).
Try and make your drawing similar to the example above.
Step 2 – Draw the Side
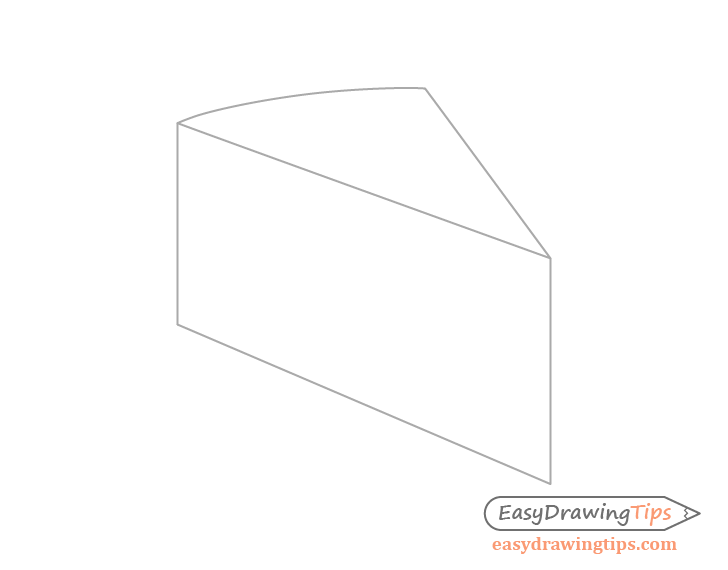
Now add the side of the cheese. Do this by drawing two straight lines going down from the right and left sides of the shape drawn in the previous step. Make the line on the right (front of the cheese) just a tiny bit taller than the one on the left. You can then join the two lines with another straight line at the bottom.
Step 3 – Draw the Holes
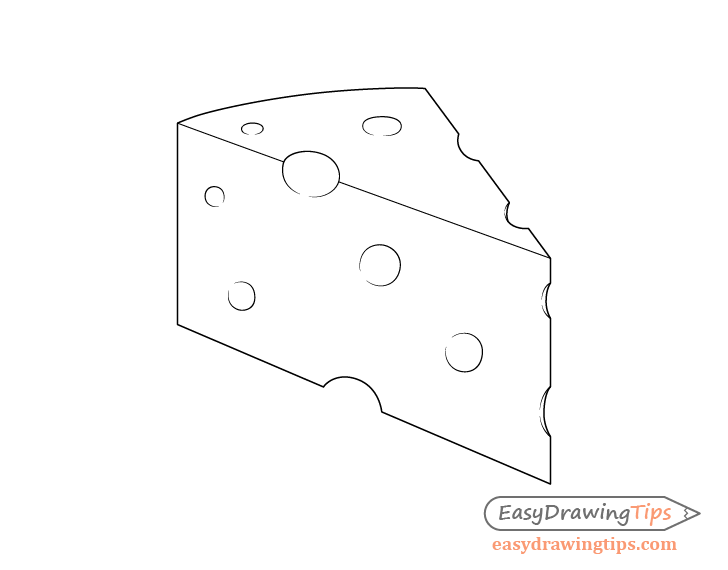
Finally give the cheese some holes. These should be fairly random in size and placement.
The holes don’t need to be perfect in shape but u should generally draw them as follows:
- Holes along the top – as ovals (because they are viewed at a fairly steam angle)
- Holes along the side – as circle (though it’s also viewed on bit of an angle but not enough to make a big difference)
- Holes along the edge – as curves or half circles (erase the part of the cheese outline where you add these)
Once done adding the holes make sure that your drawing looks right and trace over it with a black pen or marker. If you don’t have one handy you can also simply darken them with the pencil.
Step 4 – Color the Cheese Drawing
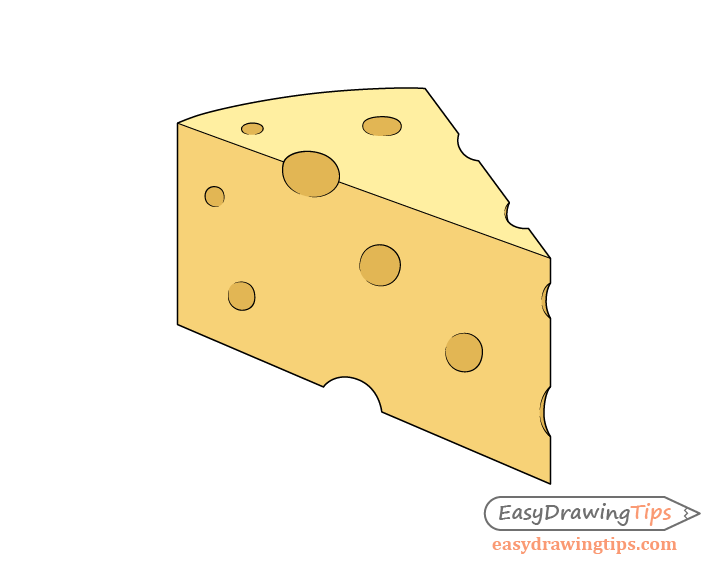
To color the piece of cheese you can make it either orange or yellow.
You can also give it a bit of shading. Generally light comes form the top (sun or indoor lighting) so make the upper side of the cheese the lightest. The holes should be the darkest (as less light reaches inside), and the side somewhere in between.
If you are going to use colored pencils first fill in the entire piece of cheese with either yellow or orange. Next lightly go over the side with brown to make it slightly darker than the top. Afterwards you can darken the holes by going over them with a brown well. Just press slightly harder on the pencil to make them darker than the shading on the side.
You can use pretty much the same approach with water based paints. First fill in the entire slice with yellow/orange, wait for the paint to dry and go over the side with a light brown. Again wait for the paint to dry and then fill in the holes with a slightly darker brown.
Once you finish coloring the piece of the cheese you should be done with the tutorial.
Conclusion
Creating a line drawing of a piece of cheese is fairly easy and by giving it some basic color and shading you can make something that looks quite nice. It’s generally always a good idea to start your drawing with light pencil lines and work down from the larger parts down to the smaller details.
If you liked this tutorial and would like to try some similar and easy food drawing tutorials also see:
- How to Draw a Pineapple Step by Step
- How to Draw a Fried Egg Step by Step
- How to Draw a Burger Step by Step
- How to Draw a Pretzel Step by Step
- How to Draw a Spoon in 6 Easy Steps
- How to Draw Tooth Paste Step by Step

")


