How to Draw a Shield Step by Step
This tutorial shows an easy way to draw a heater shield in only six steps. It includes simple illustrated example and quick drawing tips.
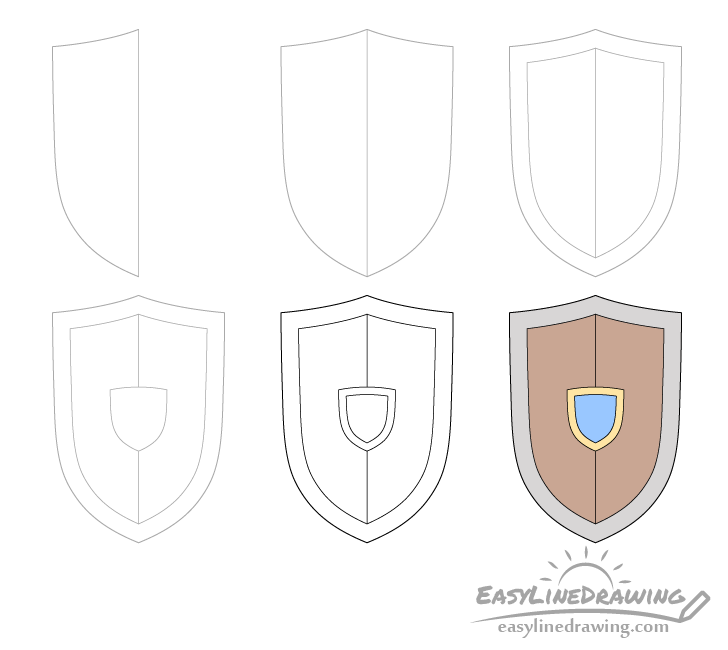
Start the drawing in pencil as you will need to erase small parts of the shield as you move between some the steps. Also keep your lines light, you can trace over them with a black pen or marker later on.
Step 1 – Draw the First Half of the Shield

Begin by making a vertical line through the middle of your drawing area. Next to one side of this line draw the first half of the shield.
As already mentioned in this case it will be a “heater shield”. These types of shields are usually fairly tall. They tend to get narrower toward the bottom ending in a pointy tip. They also often have a bit of a rise with a pointy tip at the top as well.
Step 2 – Draw the Second Half of the Shield
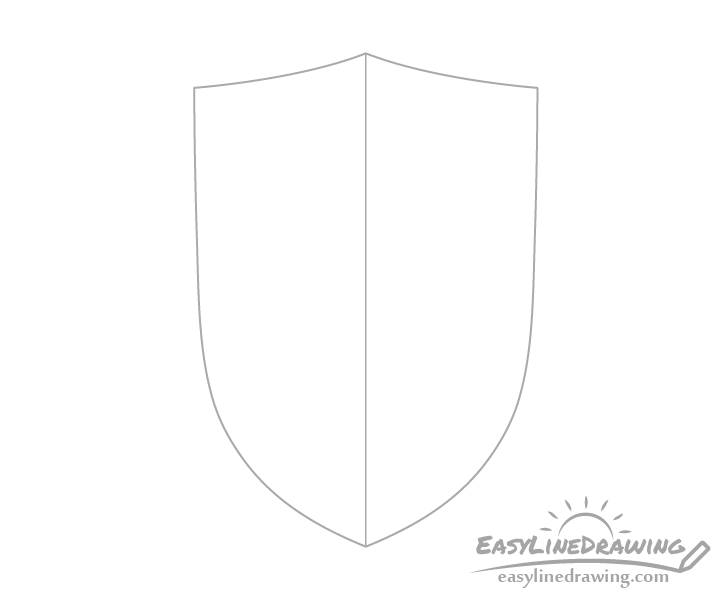
Once done drawing the first half add the second half on the other side of the line. This should basically be a flip/mirror of the first one.
It may take you a few tries to get both halves to look symmetrical. If things don’t look right simply erase the problem areas and try again.
Sometimes even if the two halves look similar you may find that the overall shape of the shield looks too wide or too tall. In this case just erase both halves and start over as it’s really not that much work to draw them.
Step 3 – Draw the Edge of the Shield
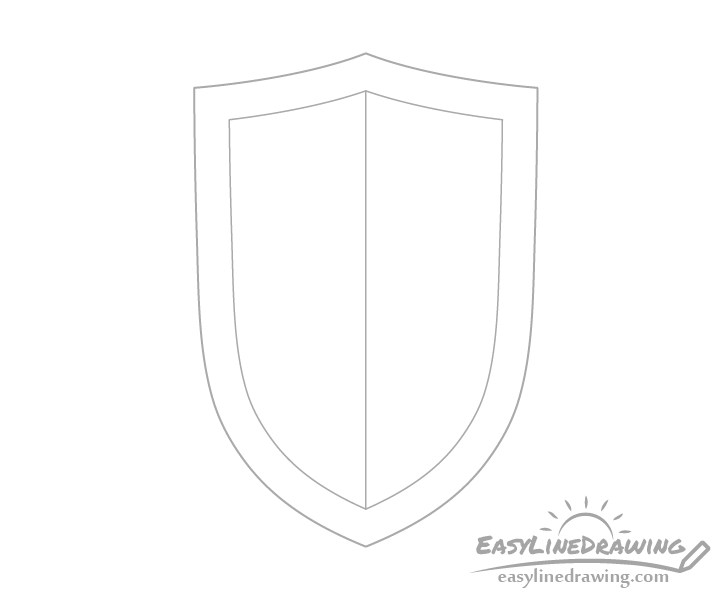
Once you have the outer shape of the shield looking the way you like you can begin adding it’s inner details. Start by giving it a sort of “frame” around it’s edge. To do this you can pretty much draw a smaller version of the shield inside the larger one. This should be much easier than the first two steps because you now have the main outline to use as a guide.
Erase the parts of the center line along the top and bottom of the “frame” once done drawing it.
Step 4 – Draw the Main Inner Design of the Shield
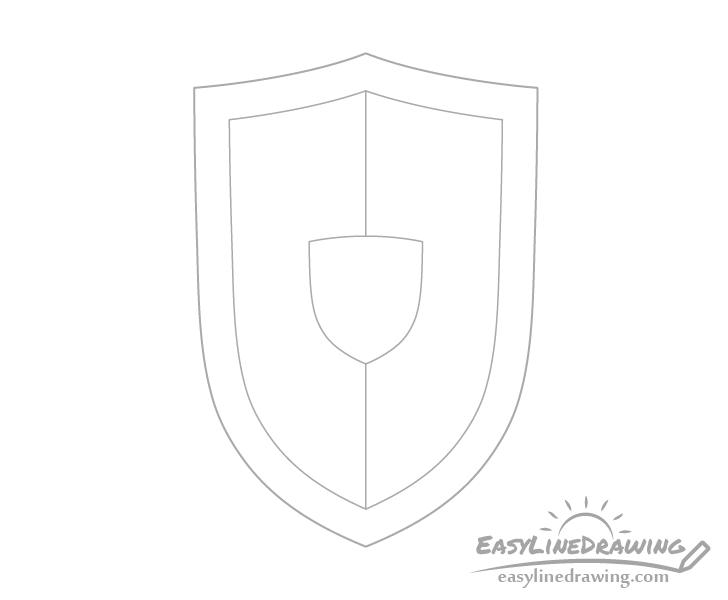
With the previous steps finished you should have a basic drawing of the shield. To make it look a bit more interesting you can give a bit of a design in the center. Often shields tend to have some sort of as symbol in this area.
You can make the symbol pretty much anything you like. In this case it will simply again have a shape somewhat similar to the shield itself but with a rounded top.
Erase the center line along this part of the shield once done drawing it.
Step 5 – Finish the Line Drawing

Similar to step three again draw a “frame”, this time along the center shape of the shield. Once done should be almost finished with the line drawing part of the tutorial.
As mentioned at the start you can now use a black pen or marker to trace over your lines. If you don’t have one handy you can also simply darken them with the pencil. Just make sure that your drawing looks right before you do this.
Step 6 – Color the Shield
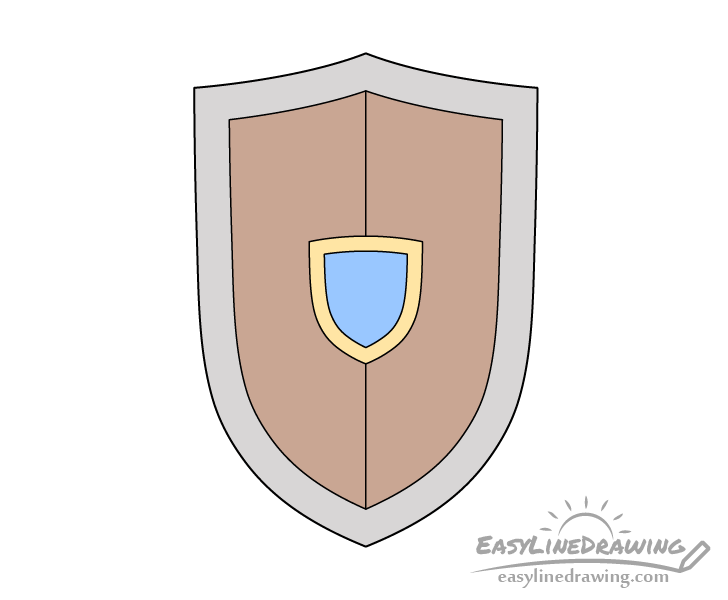
You can color the shield using just about anything you like. Paints, markers, colored pencils, etc… Usually the frame along the edge will be metallic so in this case it will be a light grey. The inside of the shield will be a fairly plain brown.
To make the symbol/inner part stand out more it will be a brighter blue with a yellow edge. These colors tend to go well together but of course you can also use a different combination if you prefer.
After you finish coloring you should have a finished drawing of a heater shield.
Conclusion
This tutorial shows how you can make a simple drawing of a shield that still looks quite nice. The important part is to first get the outer shape to look good (be symmetrical, not too tall or wide, etc…). Once that’s done drawing the rest of the shield can be fairly easy.
If you liked this tutorial you might also be interested in:
- How to Draw a Sword Step by Step
- How to Draw a Spear Step by Step
- How to Draw a Bow & Arrow Step by Step
- How to Draw a Magic Staff Step by Step

")


