How to Draw an Orange Step by Step
This tutorial shows how to draw an orange in four steps. It provides simple drawing examples with quick explanations for each of them.

In this example the orange is drawn from 3/4 view as it’s a good angle to show off it’s details.
It’s recommended that you start the line drawing portion of the tutorial in pencil and switch to a black pen or marker after you are almost done.
For drawing an orange slice see:
How to Draw an Orange Slice Step by Step
Step 1 – Draw the Outline of the Orange
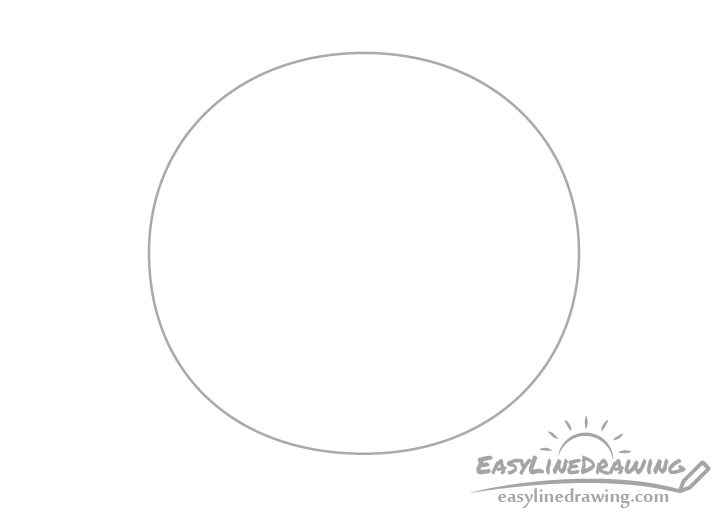
First draw the outer shape of the orange as shown above. In this case it will be somewhat similar to an oval.
Step 2 – Draw the Pedicel & Wrinkles
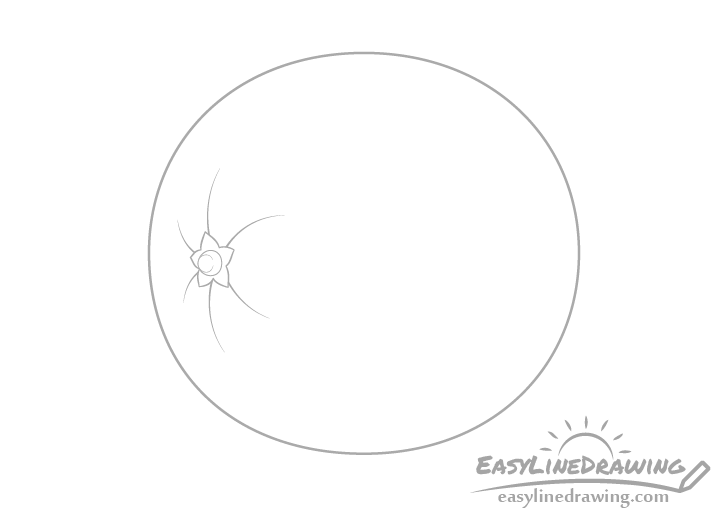
To one side of the outline add the pedicel (the little green tip). Draw it with a star like shape and make the little leaves that form it slightly larger on the side facing towards the viewer.
Inside the star draw a little bump as shown in the example.
Going out from the pedicel add a few curved lines to give the orange some “wrinkles” that they often have around that area.
Step 3 – Draw the Texture & Finish the Line Drawing
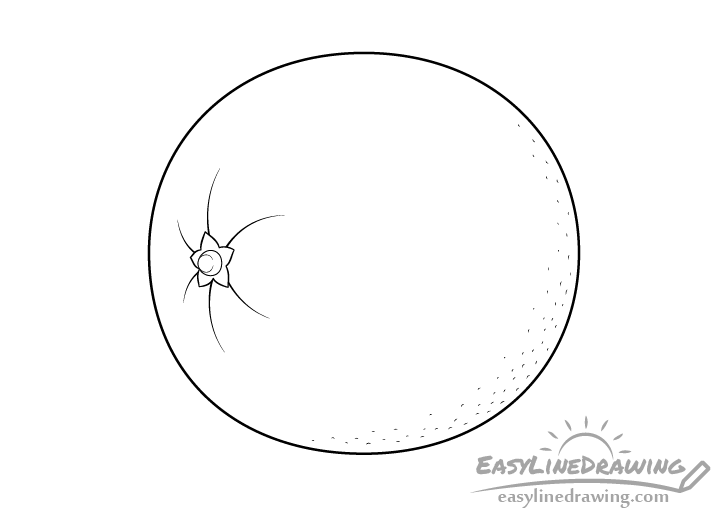
At this stage you can go over the line drawing with either a black pen, marker or darker pencil lines. Afterwards you can also add a hint of it’s texture with some tiny curves. Add these to the side opposite the going along the bottom right of the orange (as shown in the example). If you feel confident enough you can draw them in pen/marker right away. If you are not so sure that you will get the curves in the right place on the first try then indicate them in pencil beforehand.
Step 4 – Color the Orange
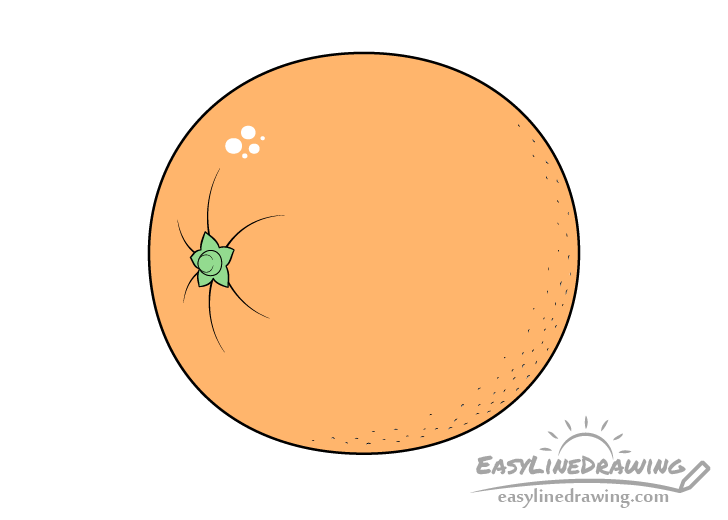
Color the orange with whatever you like (paints, colored pencils or markers). Make it’s skin orange (obviously) and make the pedicel green. However leave a few small white spots for the reflections. Place the highlight just a little bit above the pedicel/wrinkles. The reason you want to have several of these white pots instead of just one big area is to emphasize the slight bumpiness of the skin which will break up the light.
Alternatively you can also fill in the entire orange with color and add the highlights with a white correction pen (if you happen to have one) on top of it.
Conclusion
While drawing anything from 3/4 view usually tends to be more difficult than from one particular side in this case it’s not that hard. By adding just the right amount of details in the right places you can have a nice and fairly realistic looking orange that is not too time consuming to draw.
For more similar tutorials see:
- How to Draw a Lemon Step by Step
- How to Draw a Mango Step by Step
- How to Draw a Pear Step by Step
- How to Draw Grapes Step by Step
- How to Draw Cherries Step by Step
- How to Draw a Papaya Step by Step

")


