How to Draw an Ice Cream Cone Step by Step
This tutorial shows how to draw an ice cream cone in eight steps with illustrated examples and easy to follow instructions.
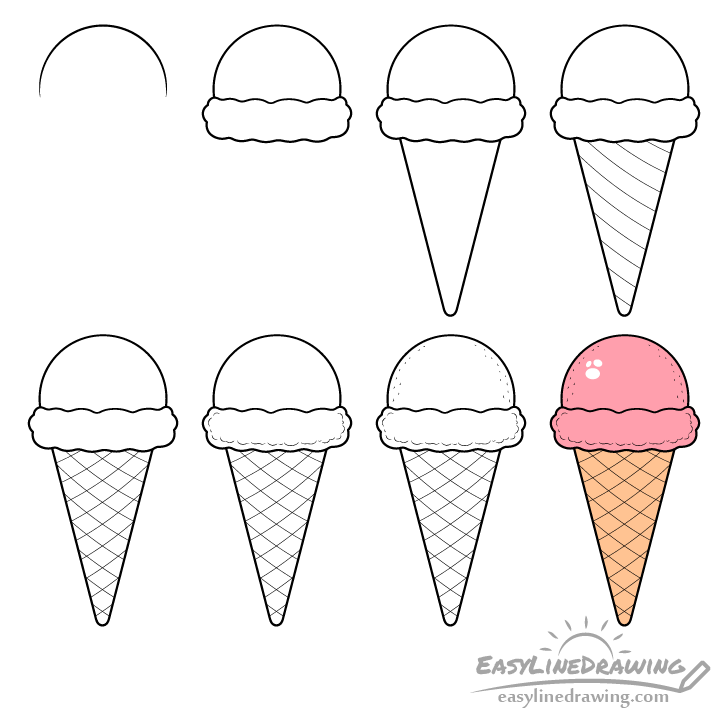
You can see a breakdown of the drawing stages for the ice cream cone in the image above. In the example the ice cream will be pink but you can also make it a different color if you want to show a different flavour.
It’s recommended that you start the tutorial using a pencil and make light lines that you can easily erase in case you make a mistake. You may also want to have a black marker or pen to trace over your drawing later on along with some colored pencils, makers or paints to color it.
For drawing an ice pop or an ice cream on a stick see:
How to Draw an Ice Pop Step by Step
Step 1 – Draw the Ice Cream Scoop
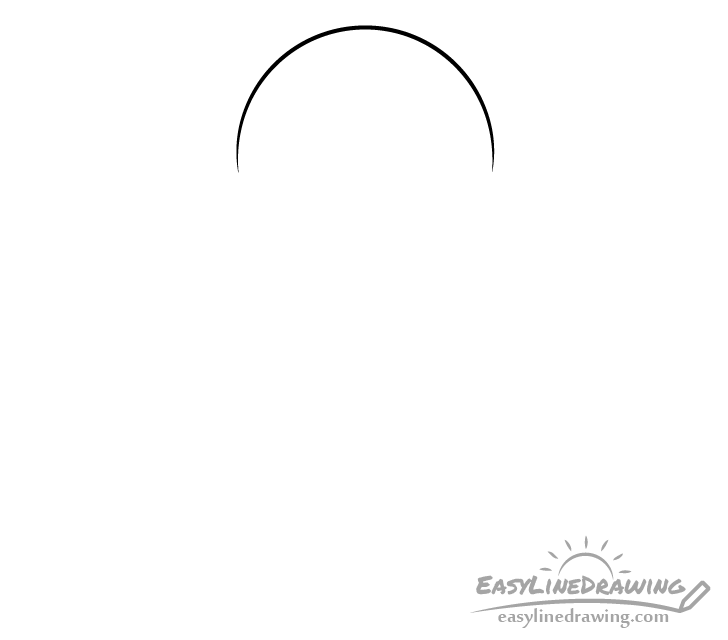
You will want to first draw the larger shapes of the ice cream before moving on to the smaller details. Begin by outlining the upper portion of the scoop that will sit on top of the cone. Make it’s shape close to that of a half-circle.
Step 2 – Draw the Bottom of the Scoop
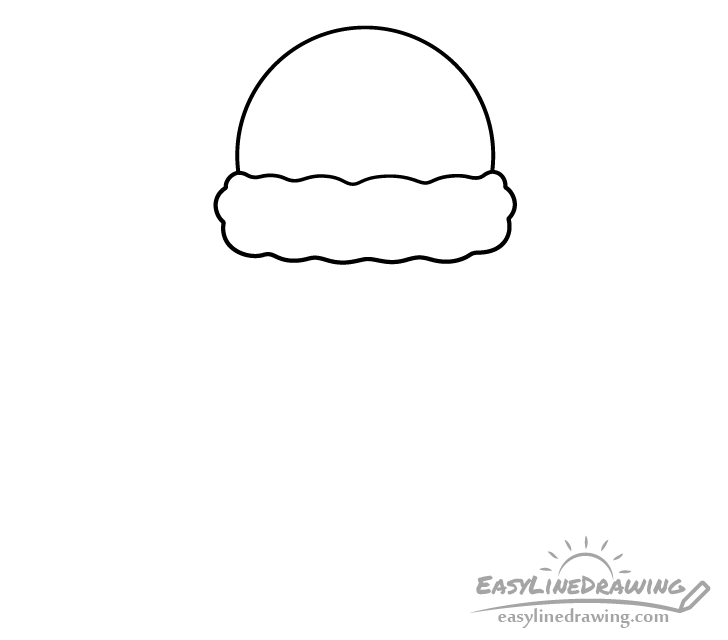
At the bottom of the scoop add the “rim” that tends to be created when the ice cream is squashed into the cone by the scoop. Give this part a wavy/uneven outline as shown in the example.
Step 3 – Draw the Cone
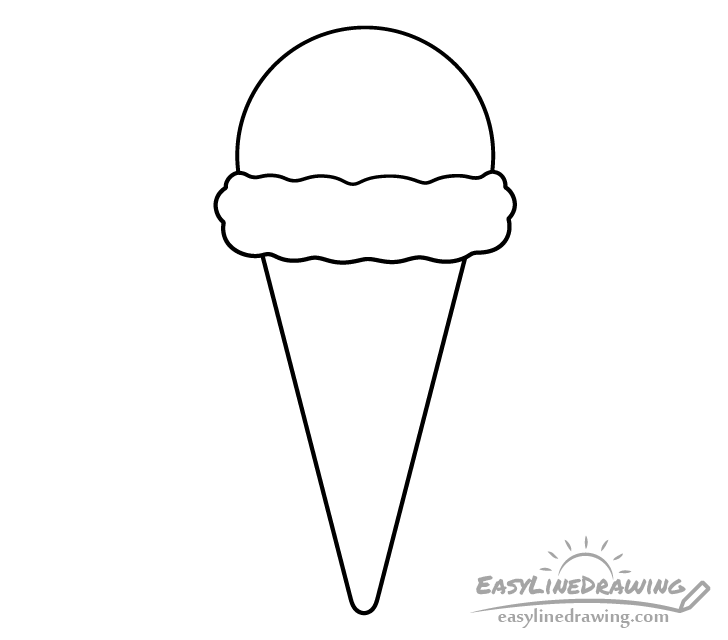
Below the scoop of ice cream draw the cone. In this example it will be a waffle one. Draw the cone wider at the top and narrower as it goes down with a rounded tip at the very bottom.
Once you have the cone in place you should have a basic outline drawing of the ice cream. Confirm that you are happy with the way it looks before moving on to the next step (make corrections if needed).
Step 4 – Draw the Cone Stripes
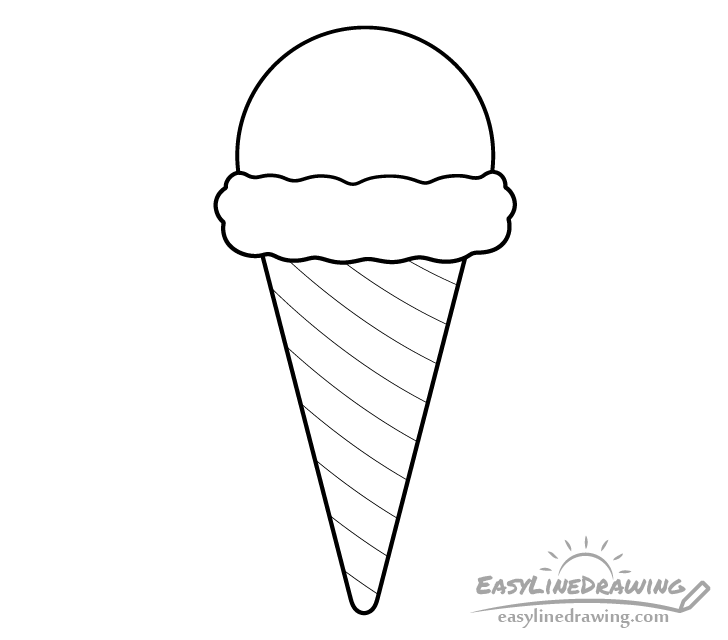
With the main parts of the ice cream outlined you can begin adding some of it’s smaller details.
Ice cream cones generally have a grid like pattern which helps give strength to their structure. To add the gird start by making a series of curved one directional lines. Draw these on an angle in relation to the cone and try and keep them evenly spaced.
Step 5 – Finish the Cone Pattern
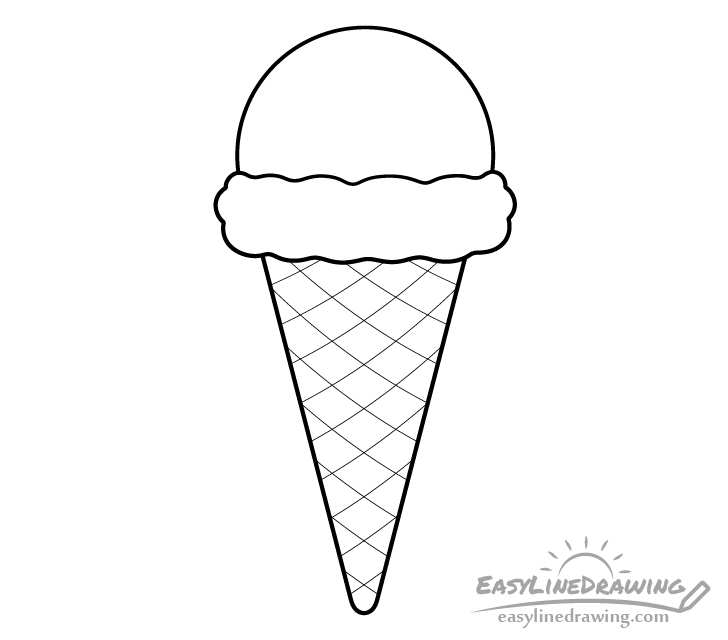
Add a second set of lines that go in the opposite direction overlapping the first set. This will create the grid effect along the cone.
Step 6 – Draw the Ice Cream Details

For the next set of details add some curves along the edges of the ice cream’s “rim” area. This will help better emphasize it’s uneven surface. Try and make the curves slightly random in size and placement so that the ice cream looks more natural.
Step 7 – Add the Ice Cream’s Texture & Finish the Line Drawing
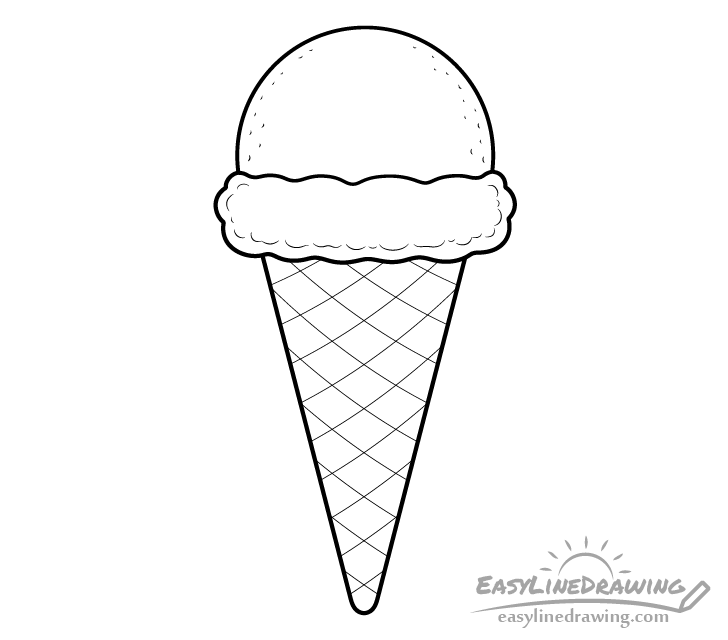
Draw the last set of details to give a slight hint of texture to the rounded part of the ice cream (drawn in step one). Add these as tiny curves randomly scattered along it’s outline (as shown in the example).
Once you finish the above go over your drawing to make sure everything looks right. If so, trace over your lines with a black pen or marker. If you don’t happen to have one around simply darken them by pressing harder on the pencil.
Step 8 – Color the Ice Cream
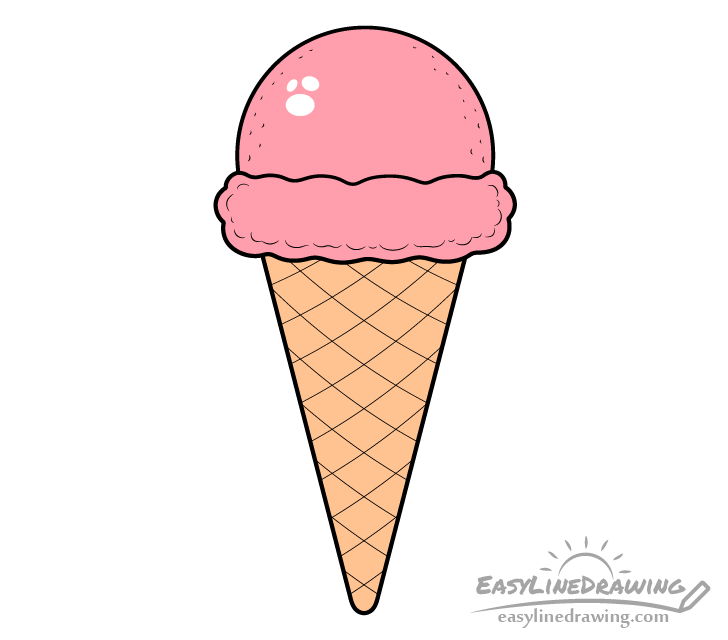
You can use just about any medium you like to color the drawing (markers, paints, colored pencils etc…).
Make the ice cream scoop pink (or any color you like) but leave a little cluster of white spots to one of it’s sides. The white areas will be the reflections that help show that the ice cream has a shiny surface (especially when it starts to melt). You can either create these as you color or lightly outline them beforehand. Alternatively you can also add them over top of the color with a white correction pen or opaque white paint.
Make the cone a light orange with a bit of brown. You can add the hint of brown by ether mixing it into some orange paint or by lightly going over top of the orange with a brown pencil. You can also just leave it as orange.
Conclusion
This tutorial shows an easy way to to create a drawing of an ice cream with a waffle cone. By taking it’s most characteristic shapes and adding just a little bit of details you can create a peace of art that is simple but that also look good.
If you like these types of guides that show good drawing practices with an easy to follow step by step approach also try the following:
- How to Draw a Doughnut Step by Step
- How to Draw a Cupcake Step by Step
- How to Draw a Pizza Step by Step
- How to Draw a Cake Slice Step by Step
- How to Draw a Burger Step by Step


")


