How to Draw a Peach Step by Step
This step by step tutorial shows how to draw a peach with a leaf. Each step includes simple beginner friendly drawing examples and explanations.

The peach drawing shown as the example in this guide is fairly simple. It does not have too many complex details but at the same time it’s also not overly plain. The tutorial illustrates how you can create a basic reflection that help’s give the drawing a more three dimensional appearance and also helps show that the peach has a fuzzy surface. It also shows how you can make the peach look ripe by adding some red to one of it’s sides.
Start the tutorial in pencil and make light lines as you will need to erase a part of the drawing in one of the steps. You can darken them with a black pen or marker before coloring.
Step 1 – Draw the Outer Shape of the Peach

Begin by making a line drawing of the outer shape of the peach itself (without the leaves or any of the smaller details). In this position it will tend to be loosely similar to a circle but with a bump on the bottom.
Step 2 – Draw the Split

For this step first add the “split” that peaches tend to have. Draw it as a curved line that runs along one of it’s sides going all the way to the top. At the top draw the split curving downwards and then up again to create the area that the stem grows out of
Step 3 – Draw the Stem

Coming out of the upper part of the split draw the stem. Make it fairly short (as peach stems usually are). Also, make it narrower towards the bottom and slightly wider towards the top.
Step 4 – Draw the Leaf

Going out from the stem add a fairly thin curved leaf. You will need to erase a part of the peaches outline when adding this.
Start with the outline of the leaf’s blade. Next, draw petiole (the part that attaches the leaf to the stem). This should transition into the midrib (the large vein in the middle of the leaf). Draw the midrib getting narrower as it goes towards the tip of the blade.
Going out from the midrib add hints of some smaller veins. You can show these with simple curved lines that run towards the leaf’s edges but don’t touch them.
Once you have the veins look over your drawing to make sure you’re happy with it thus far. If so, trace over your lines with a black pen or marker. You can also simply darken them with the pencil instead.
Step 5 – Color the Peach
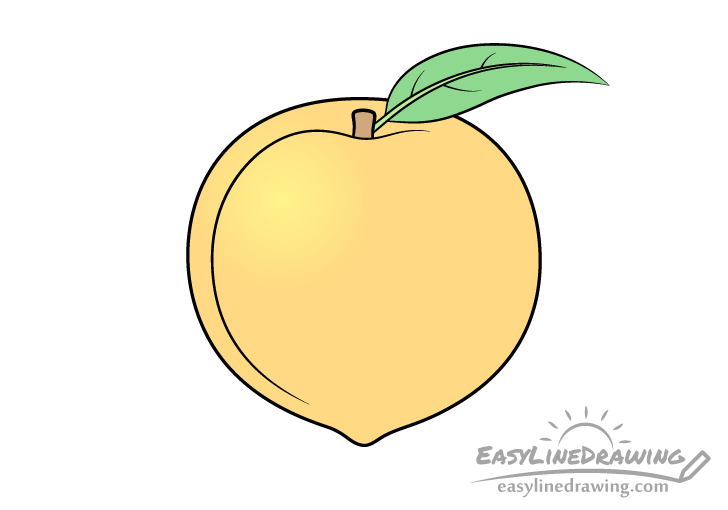
For the initial coloring step make the peach itself orange but leave a lighter spot towards the upper end of one of it’s sides (on the left in this example). This will show light reflecting from the peach and will help give it a more three dimensional appearance. Generally smoother surfaces get brighter and better defined reflections. However, peaches are usually fuzzy and the reflections along their surface will tend to be fuzzy and less defined. For this reason make the reflection yellow and blend the surrounding orange into it until you have a smooth transition between the two colors. An easy way to do this is by using colored pencils.
The yellow will stand out less than white and show that the peach is not very reflective. Being blended into the orange it will also help create a fuzzy look.
After you’ve colored the peach make the stem brown and the leaf green (use a lighter green for the midrib).
Step 6 – Add Some Color Gradient
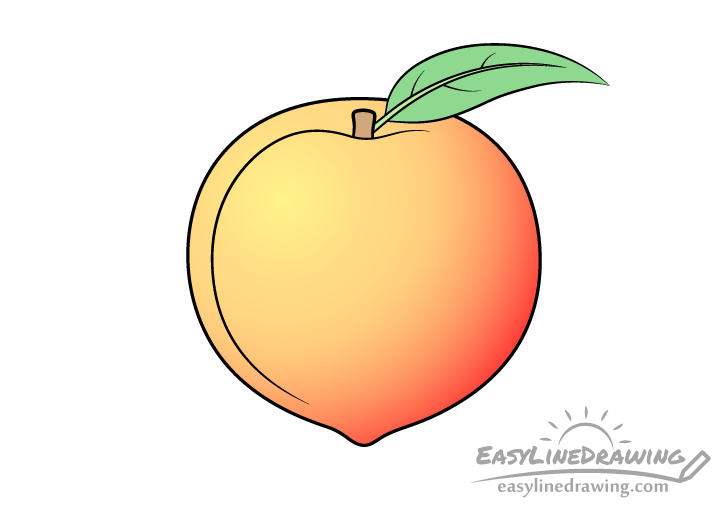
To make the peach look ripe add some red on the side opposite the reflection. Make the red darker towards the edge and lighter towards the center.
Again an easy way to do this is with colored pencils (a red one in this case). Blend the red over top of the orange to create a smooth a gradient.
Conclusion
As you can see from the example shown in this tutorial, you can create a nice looking artwork by using a fairly simple line drawing and a few basic colors. By adding a reflection and some some red along one of it’s sides you can make the peach look a lot more interesting than if it were just flat colors.
If you like the tips and detailed step by step breakdown shown in this tutorial you should also try some of the following guides:
- How to Draw a Mango Step by Step
- How to Draw Grapes Step by Step
- How to Draw Cherries Step by Step
- How to Draw a Papaya Step by Step

")


