How to Draw a Pie Slice Step by Step
This tutorial shows how to draw a slice of apple pie from 3/4 view in six steps. It includes detailed illustrated examples and quick tips.
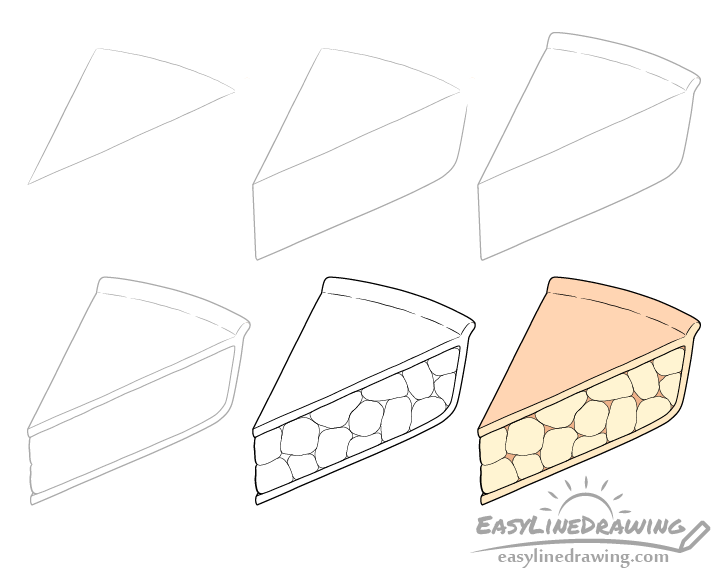
You can see a preview of the included drawing stages in the example above. The tutorial can be particularly helpful if you want to make a drawing that is not too complicated but at the same time not overly stylized.
Begin the tutorial in pencil and make light lines as you will need to erase a small parts of the drawing in a few of the steps. You can darken them later on with a black pen or marker.
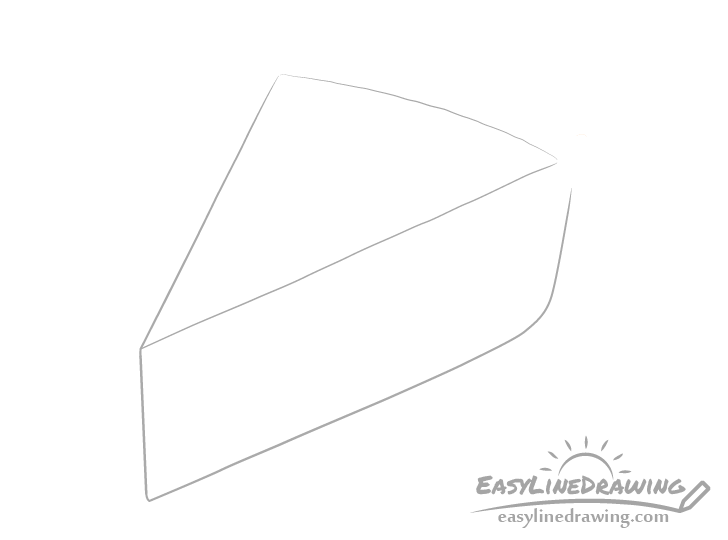
Step 1 – Draw the Top of the Pie Slice

Start by drawing the top of the pie slice as shown above. It’s shape will basically be a triangle (viewed on an angle) with a curve for one of the sides.
Don’t worry about making the lines perfectly straight, you actually want them to be a little wobbly and wavy.
Step 2 – Draw the Side
Going down from the top of the slice add the visible side of the slice but leave a little gap at the back for the crust.
Step 3 – Draw the Crust
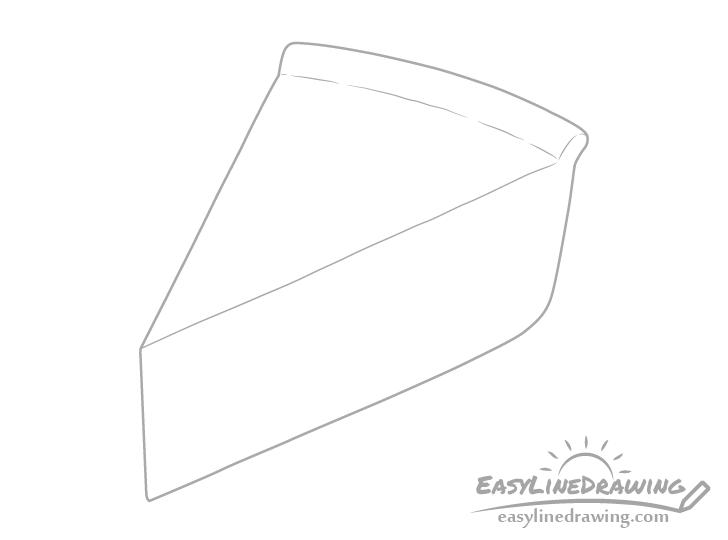
Draw the crust going slightly upwards from the upper/back end of the slice as shown in the example. You can then use an eraser to add a few little gaps into the line that defines it’s bottom (the curve drawn in step one). This will help give the crust a more uneven/natural look.
Once done you should have a finished basic outline of the main shape of the pie slice.
Step 4 – Draw the Side Details
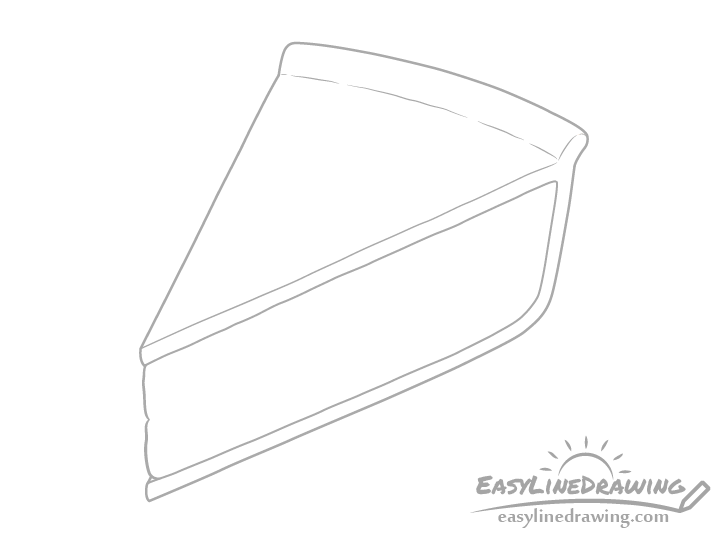
Onto the main outline of the slice you can now add some of the smaller details. In this case pretty much all of them will be on it’ side (the area added in step two).
First create the outline that will define the thickness of the crust. Afterwards erase the straight line that defined the tip in the earlier steps and replace it with an outline of the front of the apple slices, again as shown in the example.
Step 5 – Draw the Apples & Finish the Line Drawing
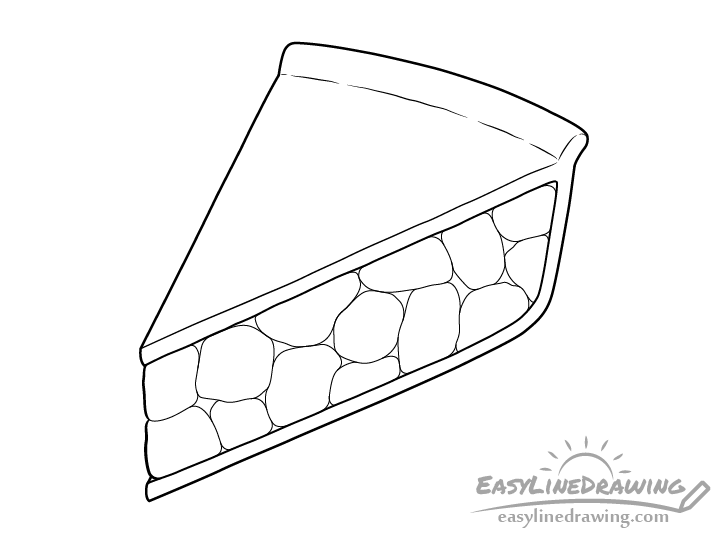
Between the crust draw in the apple slices. Try and make them uneven an of slightly different sizes. Once done you can trace over your drawing with a black pen, marker or darker pencil lines. Just be sure that you are happy with your drawing thus far before doing so.
Step 6 – Color the Pie Slice
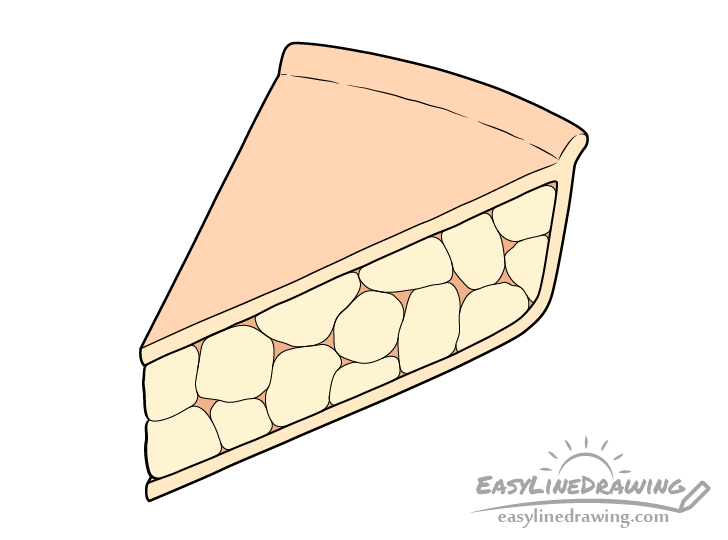
To color the slice colored pencils may be a good option.
Make the top of the crust an orange/brown and the side a lighter yellow/orange. Color the apple slices a light yellow and the filling in between them a darker orange/brown.
Once done you should have a finished drawing of the pie slice.
Conclusion
In this case the slice of pie is drawn in a simplified manner but not so much so that the drawing starts to look too plain or overly stylized (like a cartoon). If you’ve followed along hopefully you’ve enjoyed the tutorial and found it helpful.
For more similar drawing guides also see the following:
- How to Draw a Cake Slice Step by Step
- How to Draw a Cupcake Step by Step
- How to Draw a Cookie Step by Step
- How to Draw a Baguette (French Bread) Step by Step


