How to Draw a Snowman Step by Step
This tutorial shows an easy six step approach to drawing a snowman. It includes detailed illustrations and quick explanations for each step.
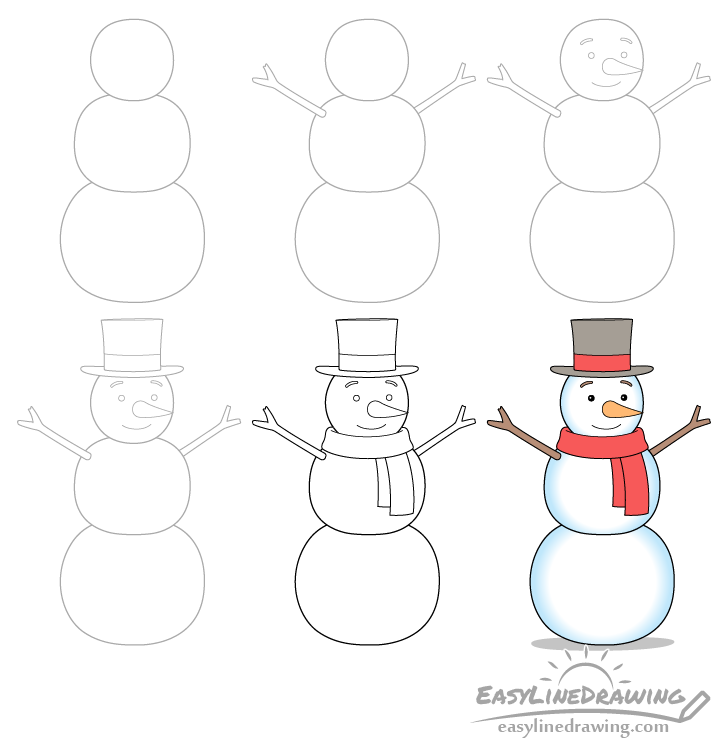
This snowman will be drawn from a 3/4 view (slightly turned to one side). The examples included with the steps are shown above.
Start the drawing using a pencil and make light lines that you can easily erase. You will need to do so in between several of the steps.
You may also want to have some markers/colored pencils handy if you wish to color the snowman afterwards.
Step 1 – Draw the Body of the Snowman
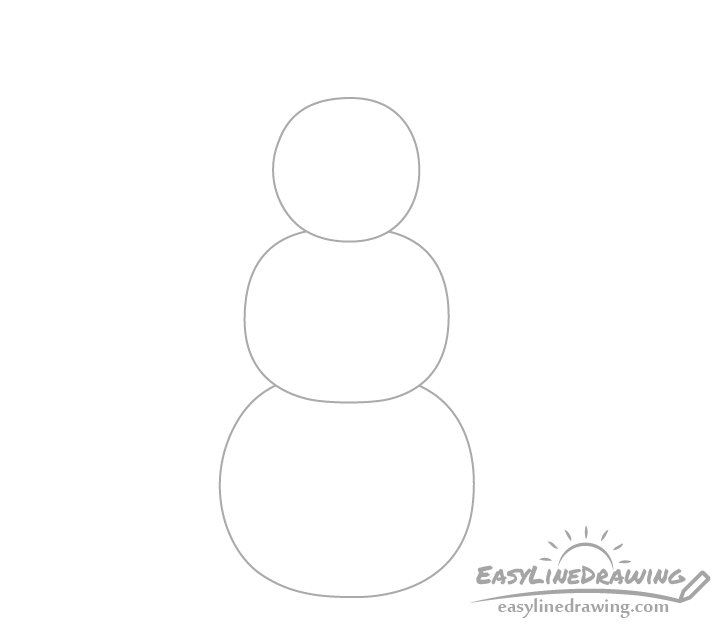
Begin by drawing the snowman’s body. You can do this as a stack of three circle like shapes. As you can see in the example these don’t need to be perfect circles. The snowman will actually look better and more natural if they aren’t.
Step 2 – Draw the Arms
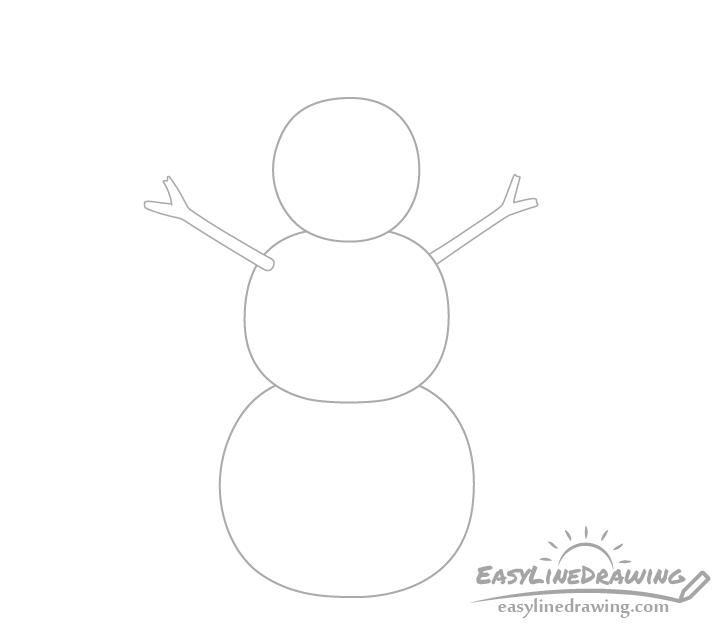
Onto the middle portion of the body draw the arms. In this case they will be a pair of branches with splits on the ends. As the snowman is slightly turned to one side make the base of the the arm on the right side of the drawing hidden behind the body. You can erase a little bit of the body’s outline when adding the arm on the left.
Step 3 – Draw the Face
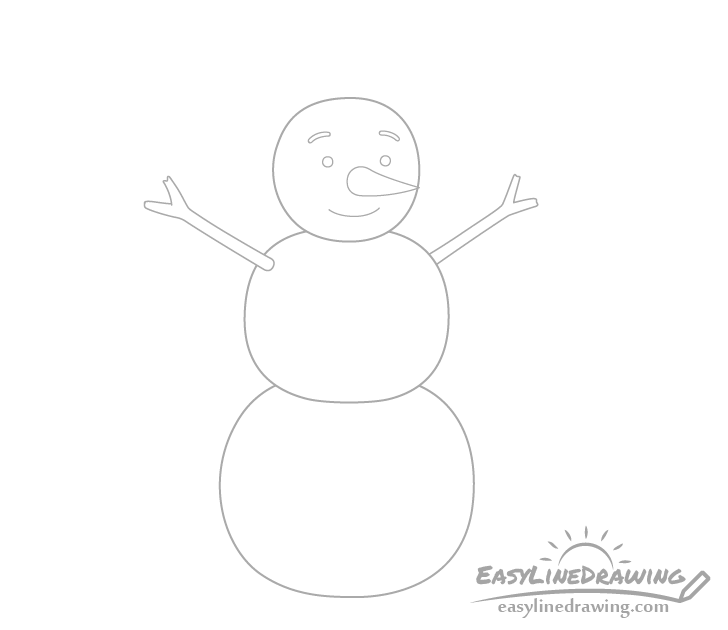
Draw the eyes as a pair of circles with lightly curved eyebrow above them (these can be small sticks).
Draw the nose as a carrot pointing to one side and draw the mouth as a simple curve (smiling).
With this you should have a basic snowman that you can now “dress up”.
Step 4 – Draw the Hat
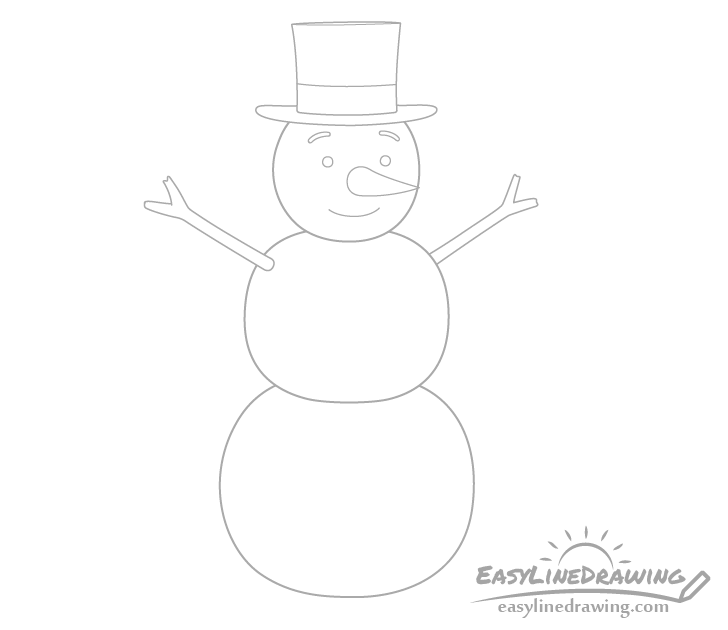
Slightly covering the top of the head draw the hat. Make it’s brim/bottom curved slightly upwards and draw it’s top as a cylinder that is slightly narrower towards the bottom.
Erase the part of the head that’s hidden by the hat once done.
Step 5 – Draw the Scarf
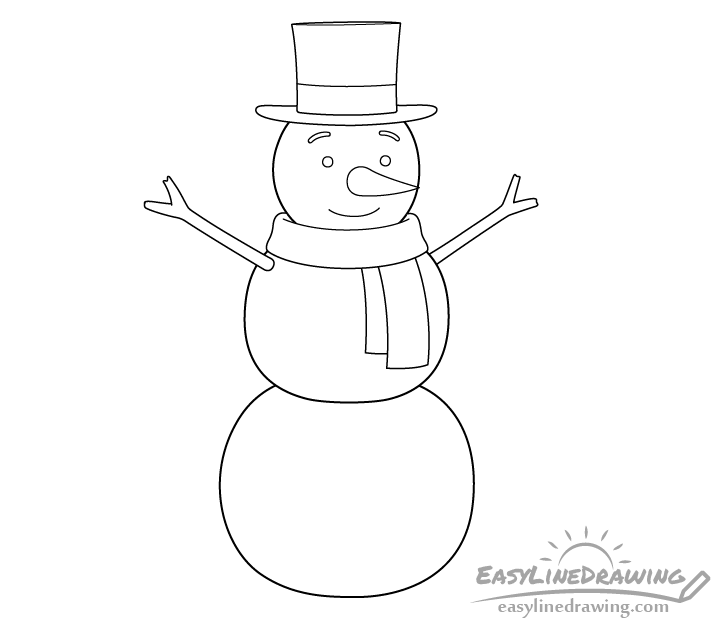
To make the snowman look even more interesting you can also give him a scarf. First draw the part that wraps around between the head and the body as shown in the example. Afterwards add the two ends hanging out from underneath it with one tucked under the other.
When adding the scarf you will also need to erase the parts of the body that it covers. You can do this either beforehand or after you have it outlined.
Once you finish the scarf go over your drawing with a black pen, marker or darker pencil lines.
For a more detailed drawing of a scarf see the following tutorial:
How to Draw a Scarf Step by Step
Step 6 – Color the Snowman
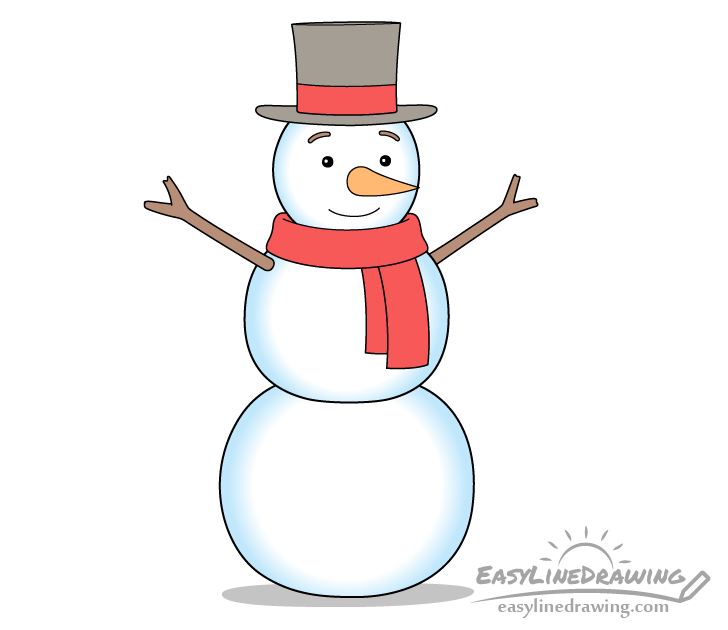
An easy way to color the snowman is with markers and/or pencils.
Make the hat grey, the band around it and the scarf red, the nose orange and the arms/eyebrows brown.
Make the eyes black but leave tiny white spots inside of them (for the reflections).
To make the snowman look like it’s actually sitting on top of something you can add grey shadow underneath it. To make it look soft the shadow does not need an outline.
You can leave the body of the snowman white but if you wish to make it a little more interesting use a colored pencil to blend a soft blue around the edges of each part.
Conclusion
Drawing a snowman is somewhat similar to building one. First construct the body, then add the details of the face and finally dress it up. Not only is this fairly intuitive it’s also a good overall approach to drawing.
For more similar tutorial also see:
- How to Draw a Snowflake Step by Step
- How to Draw a Santa Hat Step by Step
- How to Draw an Ice Cube Step by Step
- How to Draw Eye Expressions Step by Step
- How to Draw a House Step by Step
- How to Draw a Pine Tree Step by Step

")


