How to Draw a Rock Step by Step
This tutorial show how to draw a rock in six steps. It includes simple illustrated examples and quick explanations of the drawing process.
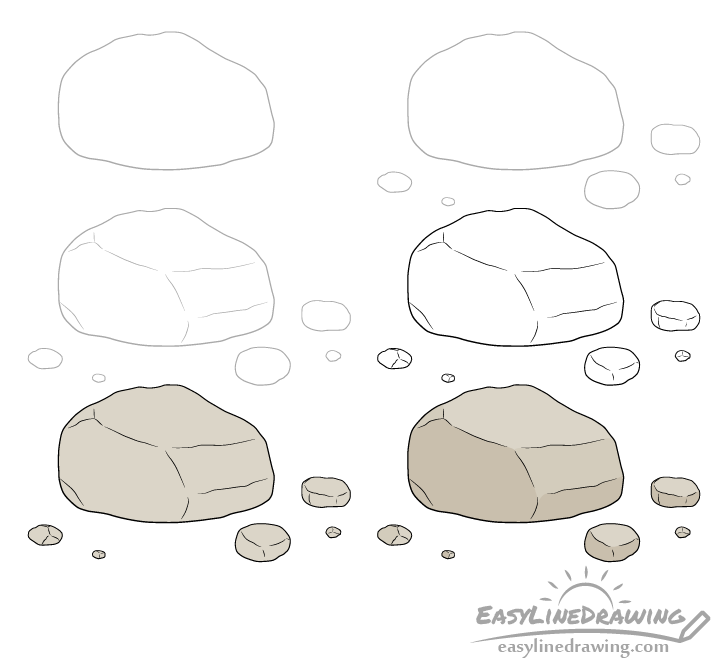
You can see a preview of the drawing steps for the rock in the example above.
A rock is a bit of an unusual object to draw as rocks come in so many shapes and sizes. Because of so much variety it can be somewhat confusing as to how to approach drawing one.
To help this tutorial shows one way to create a drawing that can actually look like a rock by taking some of the characteristics rocks are likely to have.
For this tutorial you don’t need to be overly precise in the way you make your lines lines. However, its still generally a good idea to start the drawing in pencil and to keep them light in case you do want to make a correction. You can darken your lines before coloring.
Step 1 – Draw the Outline of the Rock
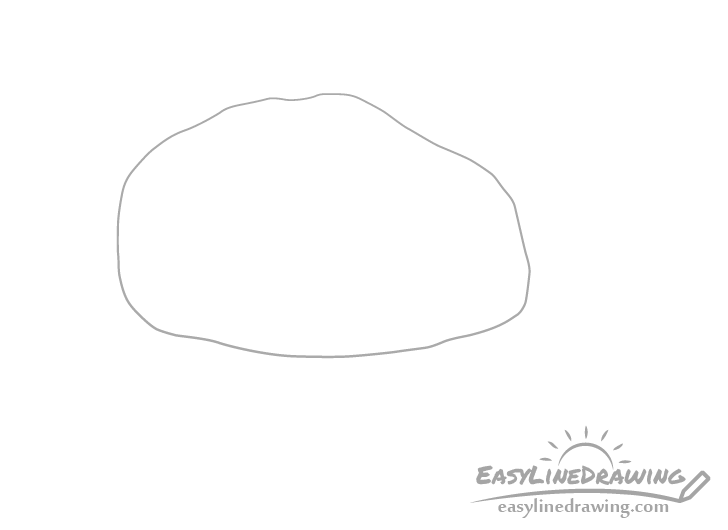
Begin by outlining the overall shape of the rock, basically it’s silhouette. Make the outline bumpy and uneven in some places and smoother in others.
Step 2 – Draw the Outlines of a Few Pebbles
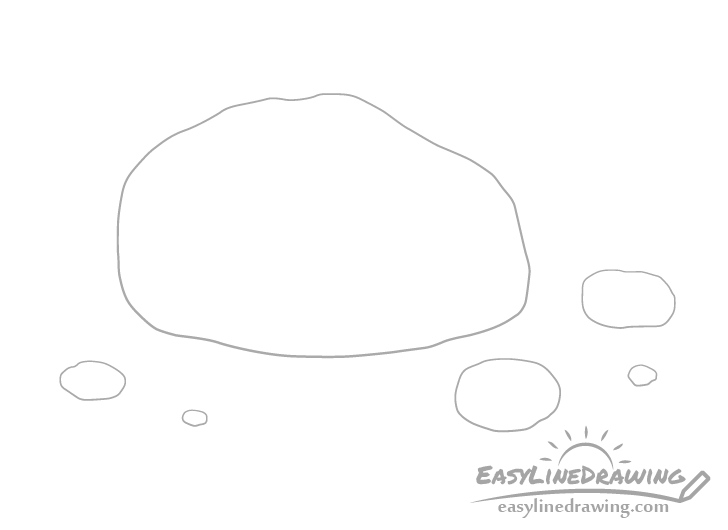
To make your drawing look a little more interesting you can add some small pebbles/fragments around the rock. Of course you can also leave just the rock itself if that’s all you want to draw.
If you do want to add the pebbles draw their outlines in pretty much the same way as that of the larger rock.
Step 3 – Add the Details of the Rock
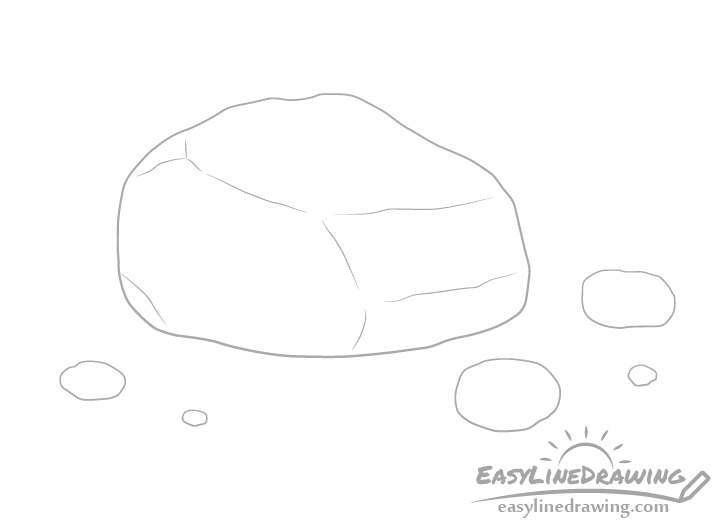
Inside the outline of the rock draw a few smaller lines that will define the different parts of the rock’s surface.
Step 4 – Add the Details of the Pebbles
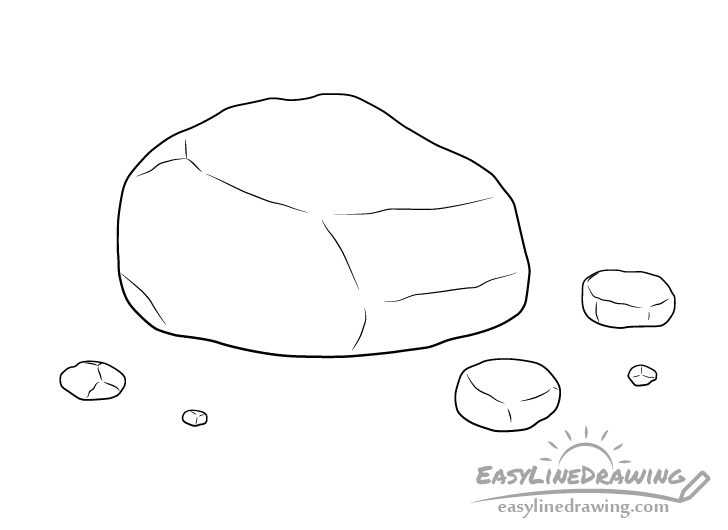
If you decided to draw the pebbles add some details to them as well.
Following whatever option you choose trace over your lines with a black pen or marker. You may also (optionally) want to make the main outline of the larger rock slightly thicker than that around the smaller ones.
Step 5 – Color the Rock
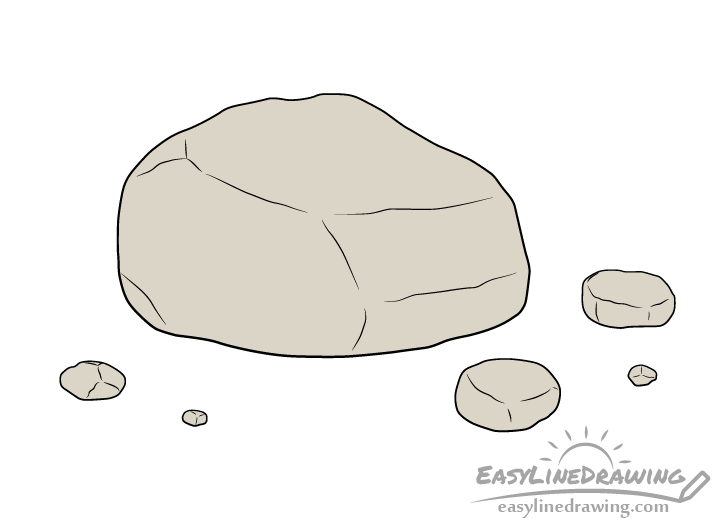
In this case the rock’s color will be a mix of yellow/orange/grey. You can also simply make the rock grey by just shading it with the pencil. Otherwise you can shade it in several layers using colored pencils to get a similar color.
Step 6 – Shade the Rock
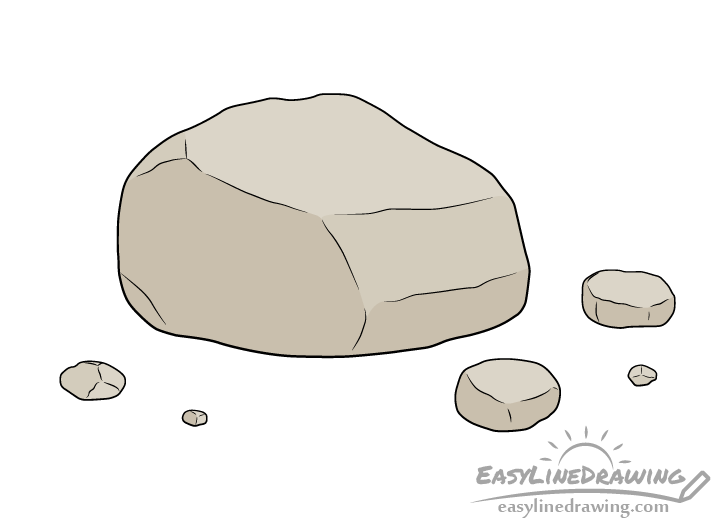
To make the rock and pebbles look more three dimensions you can also add some shading.
As light tends to come fro the top don’t shade the upwards facing surfaces. Shade the areas on the sides of the rock and pebbles by going over them with a darker grey.
You can also shade the surfaces on the sides that are angled more towards the top a lighter grey. An example of these would be the middle area on the right side of the main rock as well as the little bit on the upper left.
Once done shading you should have a finished rock drawing.
Conclusion
As mentioned at the start of the tutorial, rocks come in many shapes and sizes and this is just one way to draw one. However, if you want to draw a rock with a different shape you can still generally use the same approach of outlining it’s silhouette and then adding the smaller details such as the various bends and curves.
If you’ve found this tutorial helpful you might also like:
- How to Draw a Log Step by Step
- How to Draw a Mining Pick Step by Step
- How to Draw a Hammer Step by Step
- How to Draw a Tree Step by Step


")


