How to Draw a Log Step by Step
This tutorial shows how to draw a tree log with a branch stump in six steps. It provides illustrated examples and simple drawing instructions.
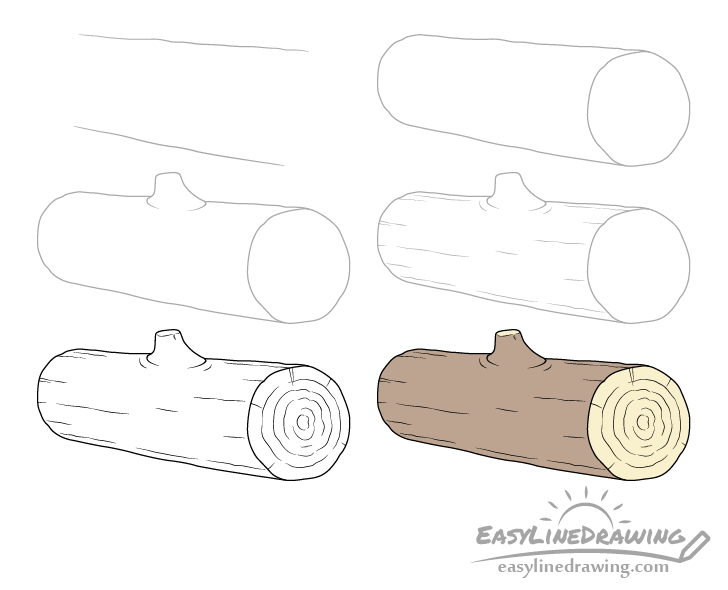
Above is a preview of the drawing steps for the log.
One easy thing about this tutorial is that you don’t need to worry about making straight lines. When outlining the different parts of the log you actually want the lines to be somewhat wobbly as usually trees trunks/logs are not perfectly straight or cylindrical. However, you should still start the tutorial in pencil and make light lines that you can easily erase in case you make a bigger mistake. You can darken your lines once you feel everything looks right by tracing over them with a black pen or marker.
Step 1 – Draw the Lines for the Trunk of the Log
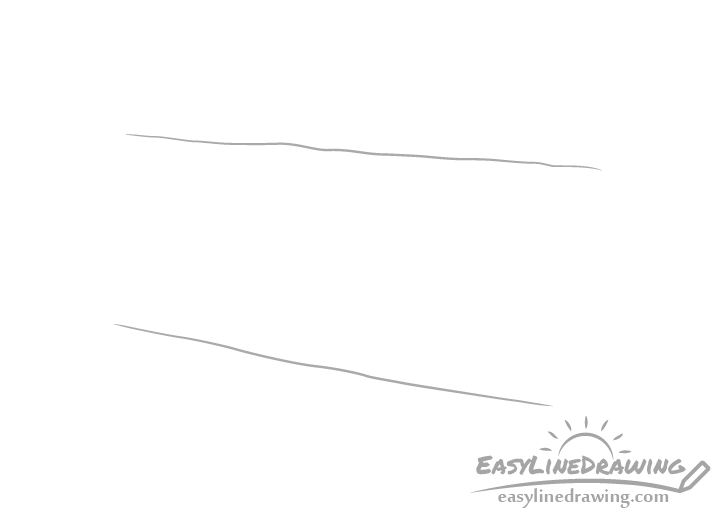
Begin by drawing a pair of lines to set the log’s thickness. As was already mentioned don’t worry about making them straight. You actually want the two lines to be somewhat wavy and uneven. Also draw the lines slightly angled so that the log is wider towards the front (right side of the drawing) and narrower towards the back (left side of drawing)
Step 2 – Draw the Top & Bottom Cuts
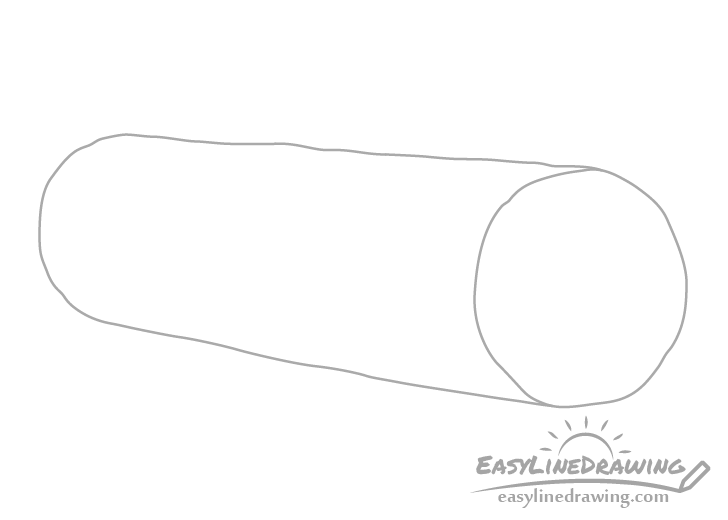
Between the two lines draw the top and bottom cuts. As the log is being viewed on an angle try and draw the cut at the front so that it’s overall shape is similar to an oval and the one at the back close to a half-oval. Again you want to deliberately make their outlines uneven.
Step 3 – Add a Branch Stump
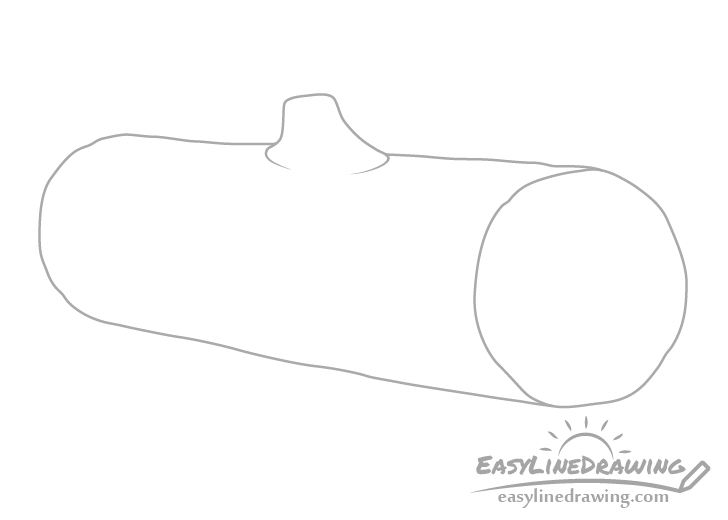
Erase a little bit of the top line from step one and add a branch stump (going up from the log).
Draw this wide at the bottom and narrower toward the top ending with a bit of a curve (as shown in the example).
Step 4 – Draw the Bark
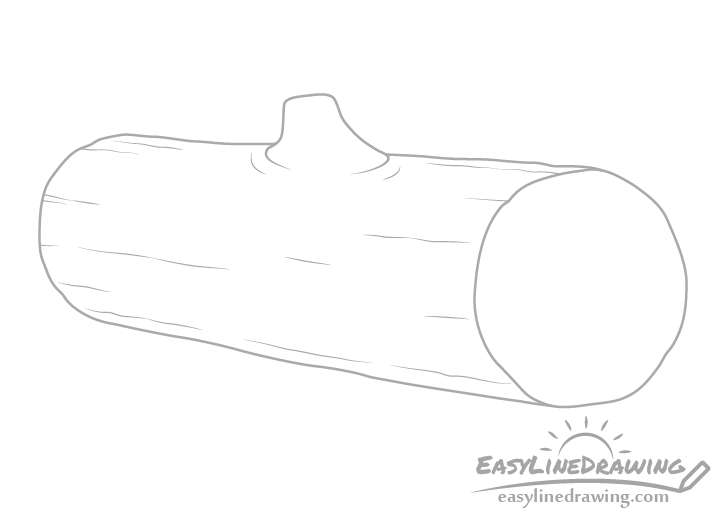
Running along the log draw some wavy and fairly randomly spaced lines of different length to show the bark.
Also draw a few small curves around the branch stump.
Step 5 – Finish the Line Drawing

Finish the line drawing by first adding some rings to the log cut. Once again make these fairly uneven in their shapes and draw them farther apart (more space between the rings) the farther they go from the center.
Next draw an outline of the cut on the branch stump (with a bit of a notch/chip in it) followed by a few little cracks around the main cut of the log.
Finally finish the line drawing by tracing over it with either a thin black marker, pen or darker pencil lines. You can also optionally make the outlines around the main shape of the log thicker and the ones around the smaller details such as the bark, rings and crack thinner.
Step 6 – Color the Log
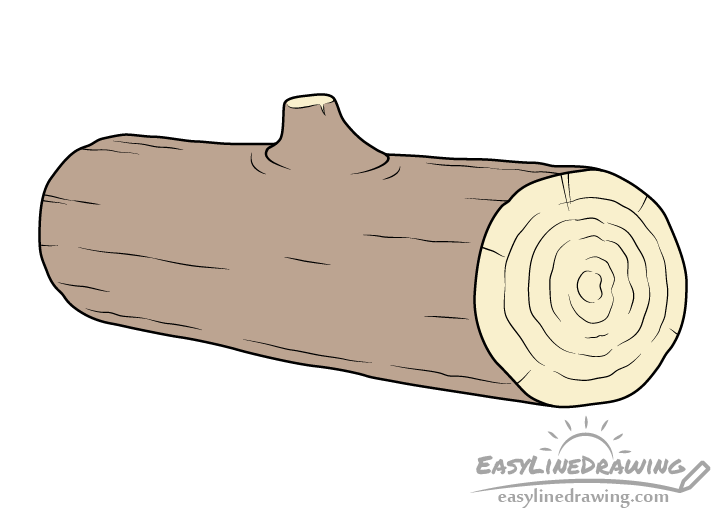
An easy way to color the log is with paints or colored pencils. Simply make the area covered by bark brown and the cuts a light yellow/brown.
For the yellow/brown you can either mix the two paints or lightly shade the cuts with a yellow pencils and then even more lightly go over them with a brown one.
After you finish adding the colors you should be done with the log drawing.
Conclusion
The log drawing in this tutorial is fairly detailed but also quite simple to make. What makes drawing a log like this easy is that you don’t need to worry about making straight lines. Tree trunks are usually not perfect in shape so slightly wavy/wobbly lines will actually make your drawing look better and more natural.
For more similar tutorials also see:
- How to Draw a Tree Step by Step
- How to Draw a Pine Tree Step by Step
- How to Draw a Leaf Step by Step
- How to Draw a Walnut Step by Step
- How to Draw Fire Step by Step
- How to Draw a Fishing Pole Step by Step


