How to Draw a Picture Frame Step by Step
This easy tutorial shows how to draw a picture frame in six steps. It provides illustrated examples for the frame itself as well as suggestions for a picture to add inside it.
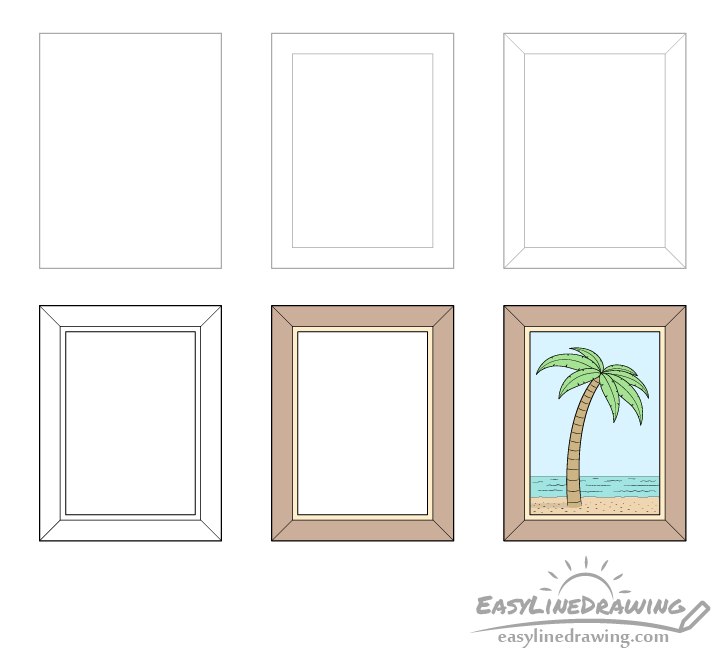
The picture frame in this tutorial will be fairly plain without any detailed decorations that some frames can have. This should make it fairly easy to draw even if you are a beginner. You can simplify things further by using a ruler to help you as the drawing will pretty much consist of straight lines. You can also draw a picture inside the frame. This can be anything you like but in this case the example is of a palm tree on a beach.
Start the tutorial in pencil and make light lines that are easy to erase in case you need to make a correction. You can darken them later on with a black pen or marker.
Step 1 – Draw the Outer Shape of the Picture Frame

Begin by drawing the overall shape of the frame. In this case it will just be a rectangle.
Step 2 – Draw the Inner Shape

Inside the larger rectangle from the first step draw a smaller one. Try and size it in a way where all of the sides of the frame will be equal in width.
Step 3 – Draw the Corners

For this simple step just draw a lines from the corners of the smaller rectangle to the corresponding corners of the larger one. This will create the splits where the different sides of the frame are connected and give the drawing that look that is so characteristic of a picture frame.
Step 4 – Draw the Inner Frame & Finish the Line Drawing
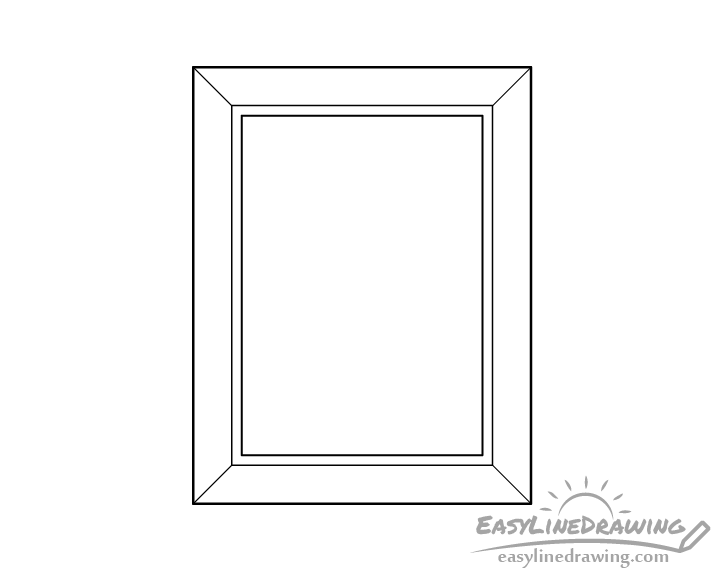
Picture frames often have a sort of “inner frame” to them. You can draw this by again adding another smaller rectangle inside the shape from the previous steps (as shown in the example).
Once done with the above you can trace over your lines with a black pen/marker or darken them with the pencil. Be sure that you are happy with the way things look up to this point before doing so.
Step 5 – Color the Picture Frame
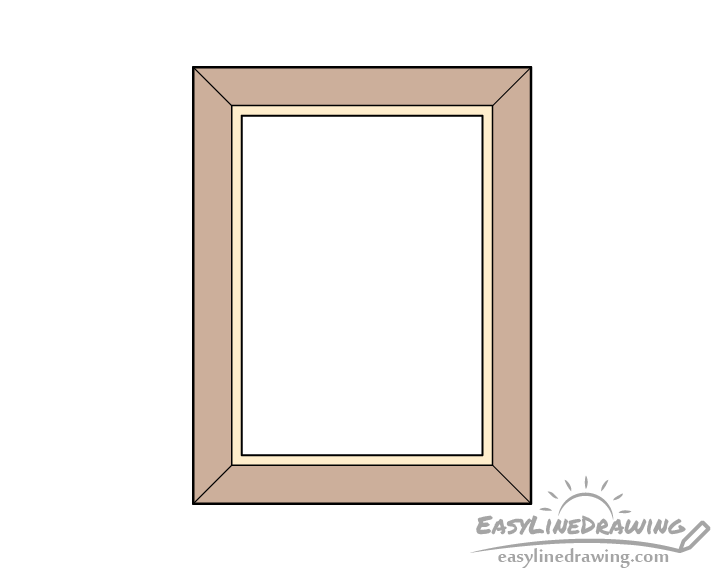
To color the frame you can use whatever medium you like such as paints, colored pencils or markers. You can either make the whole frame one solid color or use two different colors, one for it’s main part and one for the inner frame.
For the actual color choices you can again go with pretty much anything you like but in this case it will be brown and yellow.
Step 6 – Draw a Picture Inside the Frame (optional)

Once done drawing the actual frame you can also add a picture inside of it. This can be anything you like and you can also find plenty of ideas for things here on EasyLineDrawing.
For drawing the palm tree that is shown in the example see:
How to Draw a Palm Tree Step by Step
For some tips on drawing water and sand see:
Conclusion
A fairly basic picture frame like the one in this tutorial is quite easy to draw but it can still look fairly nice, especially if you also draw some sort of a picture inside it. You can use one from the other tutorials on this site or come up with one on your own.
If you’ve found this tutorial helpful you might also like some of the following:
- How to Draw Paper Step by Step
- How to Draw a Scroll Step by Step
- How to Draw a Paint Palette Step by Step
- How to Draw a Pillow Step by Step
- How to Draw a Newspaper Step by Step