How to Draw a Fighter Jet Step by Step
This tutorial shows how to draw a fighter jet in six simple steps with illustrated examples and easy to follow drawing instructions.
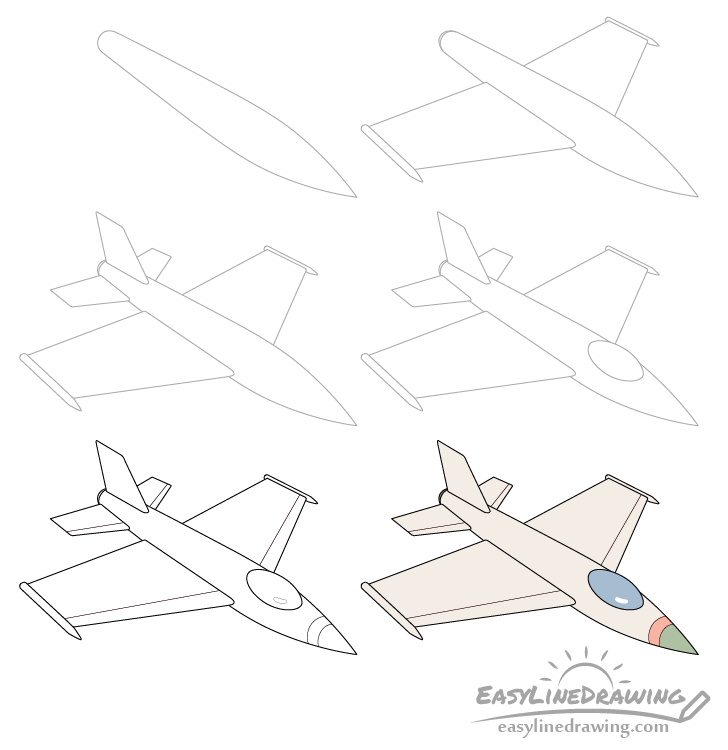
The jet in the examples is drawn in 3/4 view as its a nice angle for showing it’s shape. Though fighter jets can be fairly complex and difficult to draw this particular tutorial is made specifically for beginners and is fairly easy.
Before you being please note that you will need to do some erasing between the different steps . To make this easier start the drawing in pencil and make light lines. You can darken them when finishing the line drawing.
Ste 1 – Draw the Body of the Fighter Jet
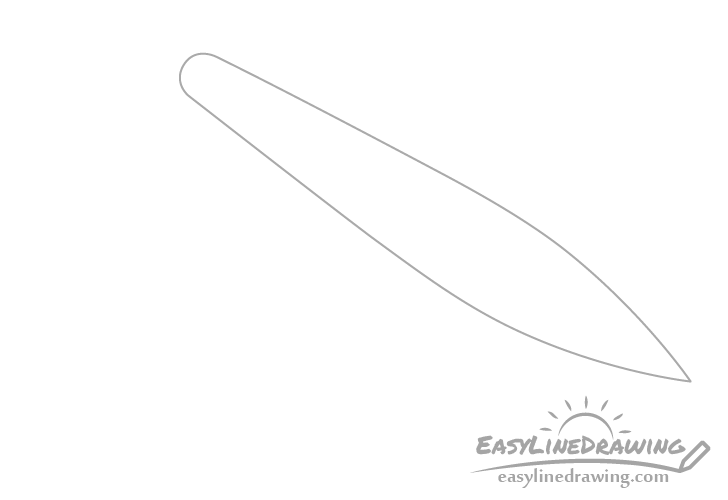
Start by drawing the main body of the fighter jet. Make the nose pointy with the overall shape being wider towards the front and narrower toward the back.
Ste 2 – Draw the Wings
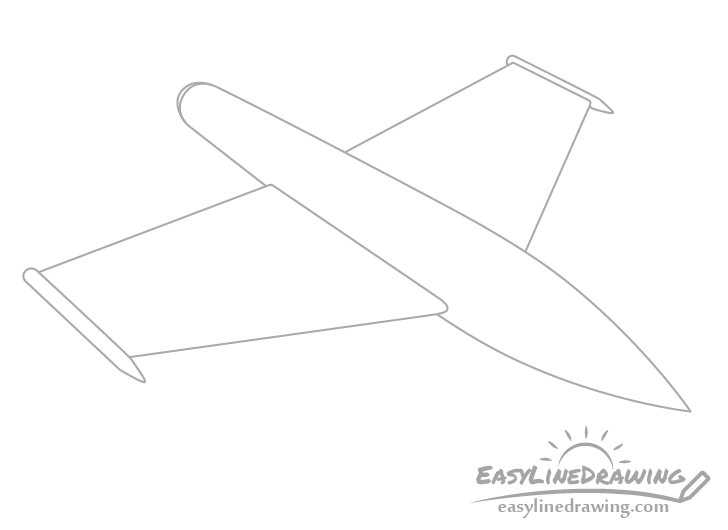
Add the wings with the one in the front larger and the one in the back smaller. One reason for this is that at this angle part of the background wing will be hidden behind the plane making it appear shorter. The other is that due to perspective objects that are further away will appear smaller.
When drawing the front wing add it overlapping the outline of the main body of the jet and erase the part that should be covered by it afterwards.
When done with the wings you can also add a tiny hint of the exhaust at the back of the main body. Show it with just a small bump curve as in the example.
Ste 3 – Draw the Tail
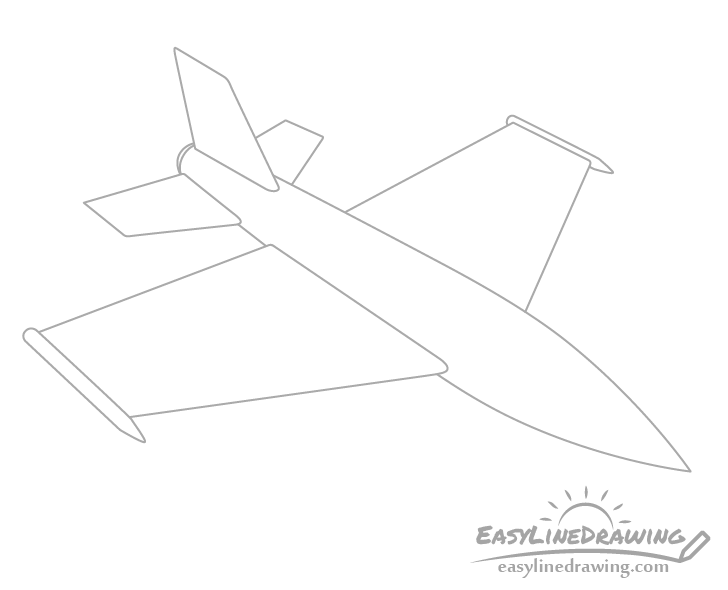
Add the tail and tail wings of the jet called the horizontal and vertical stabilizers. Draw the horizontal wings/stabilizers similar to the main wings from the previous step. Make the one in the front larger and the one in the back smaller.
You can again draw these over top of the main outline of the plane and erase the parts overlapped by them afterwards.
Ste 4 – Draw the Cockpit
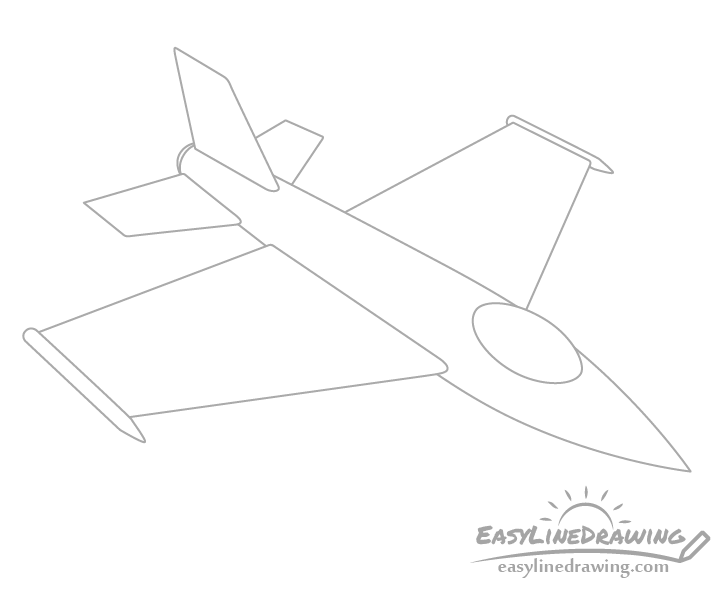
For the last major part of the plane add the the glass covering the cockpit (called the canopy). Draw this as a fairly long oval towards the front of the jet on the same angle as it’s main body.
You can erase any parts of the body/wings overlapped by the canopy.
Ste 5 – Finish the Line Drawing
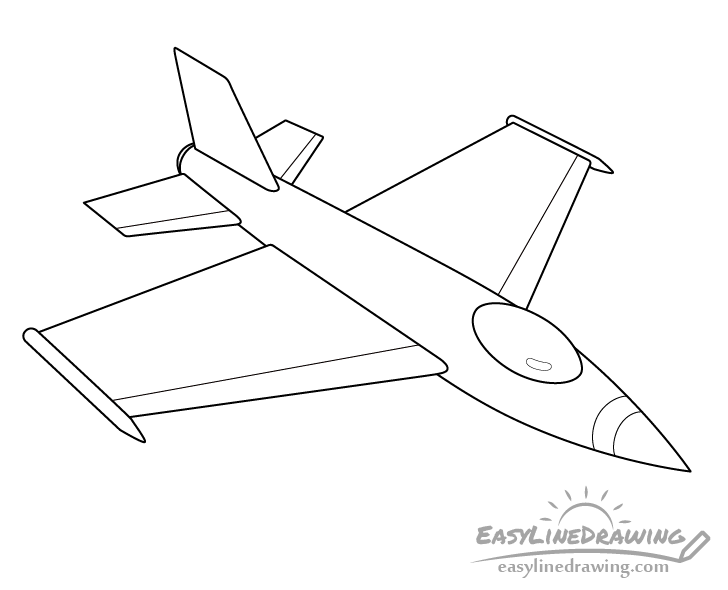
To make the plane look a little more interesting you can add some basic details around it’s wings and nose as shown above.
If you are going to color the drawing you can also outline a tiny highlight area on the glass of the canopy for the highlight. You can shape this to look sort of like bean.
Once done you can go over your pencil lines (excluding the highlight outline) with a darker stroke or a black pen/marker.
Ste 6 – Color the Fighter Jet
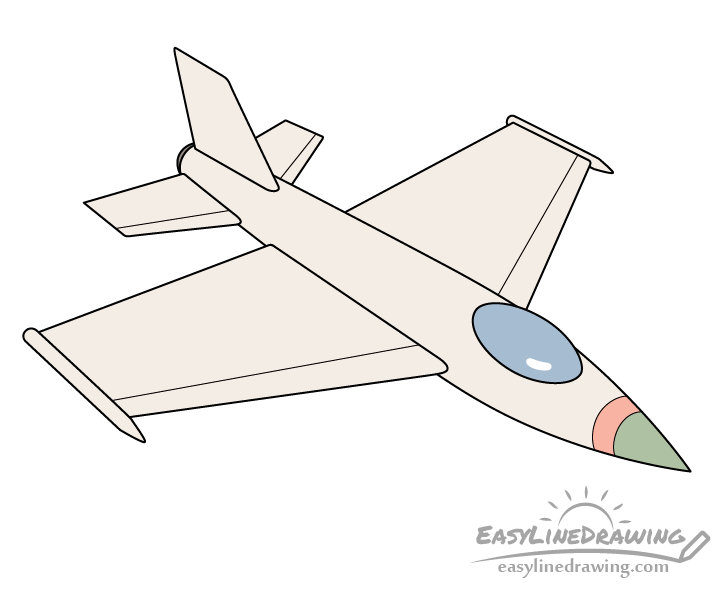
To color the fighter jet you can use paints, markers or colored pencils and go with the following colors:
- Light grey for the main body/wings
- Blue for the canopy (leave the highlight white)
- Green/red for the nose
You can of course also change up the colors to something else. For example jets used in air shows tend to have brighter colors while military jets tend to be neutral colors like grey and green.
Conclusion
Fighter jets can have a lot of complex details making them fairly difficult to draw. This tutorial simplifies the process by only taking the more important and characteristic features of one. This mean that even as a beginner you can have a plane that is fairly easy to draw yet still looks like fighter jet.
For more similar tutorials also see:
- How to Draw an Airplane Step by Step
- How to Draw a Rocket Step by Step
- How to Draw A Boat Step by Step
- How to Draw a Cartoon Car in 12 Steps
- How to Draw a Cloud Step by Step
- How to Draw a Sword Step by Step
- How to Draw a Shield Step by Step