How to Draw a Stamp Step by Step
This tutorial shows how to draw a postage stamp in a six steps with illustrated examples and quick drawing instructions.
The main focus of the tutorial is on drawing the shape of the stamp but. You can see the steps for drawing the picture on it in a different tutorial linked in step six.
Start the tutorial in pencil and make light lines that are easy to erase in case you make a mistake. You can darken them later on with a black pen or marker.
For drawing an envelope see:
How to Drawn an Envelope Step by Step
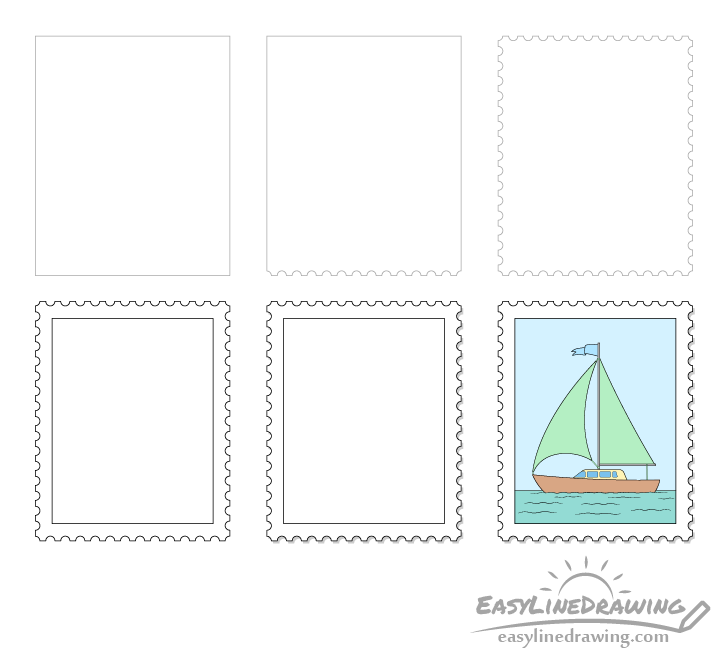
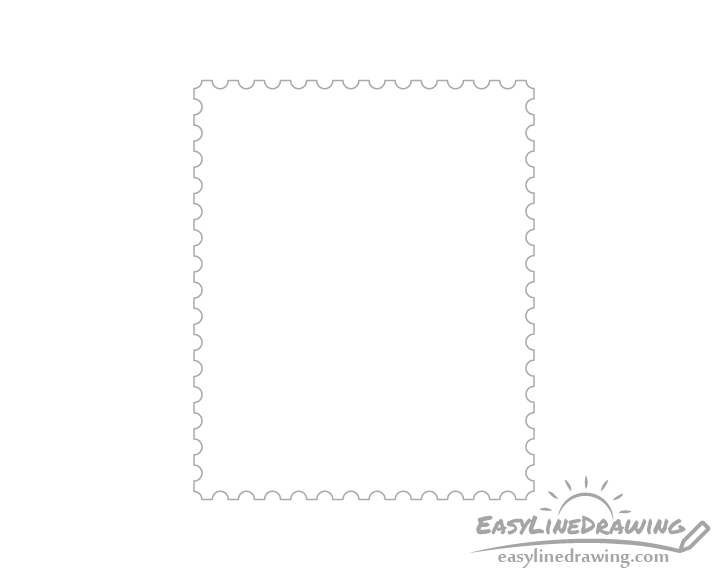
Step 1 – Outline the Shape of the Stamp
Begin with a outline of the overall shape of the stamp, in this case a simple (vertical) rectangle.
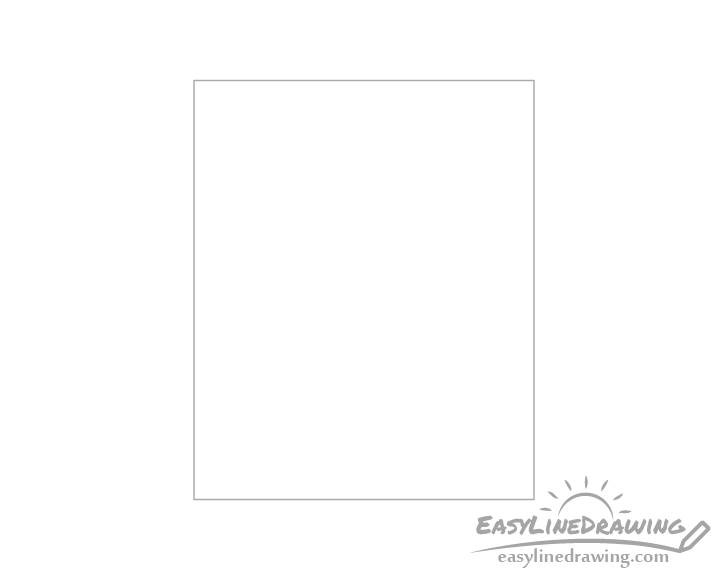
Step 2 – Draw the First Set of Perforations
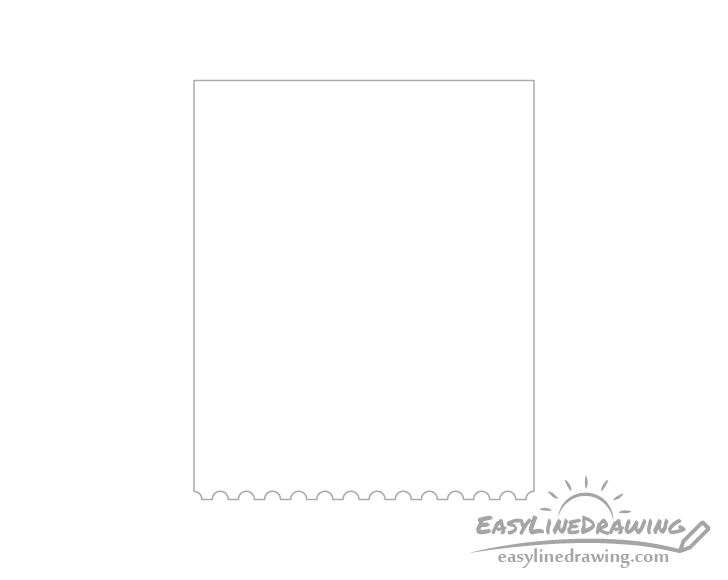
Along one of the sides draw a series of perforations (little holes) that are so characteristic of a postage stamps.
You can use the outline from the previous step to help align the perforations as shown in the example above. Draw them as small half-circles running along the side of the stamp (quarter circles on the sides). Once done erase the parts of the outline that have the holes through them so that you have a nice and clean drawing like the previous example.
Step 3 – Draw the Rest of the Perforations
Repeat the previous step for each side of the stamp so that you have perforations along it’s entire outline. You should have a drawing similar to the above example once done.
Step 4 – Draw the Frame & Finish the Line Drawing
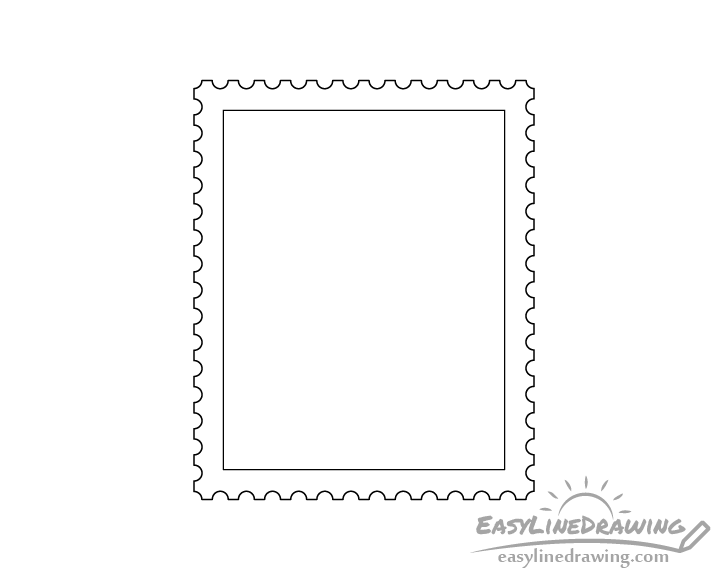
Draw a smaller rectangle inside the outline of the stamp to create a little frame around it. Once done this this simple step you can trace over your lines with a black pen or marker. If you don’t happen to have one around simply darken them with the pencil.
Step 5 – Add a Shadow
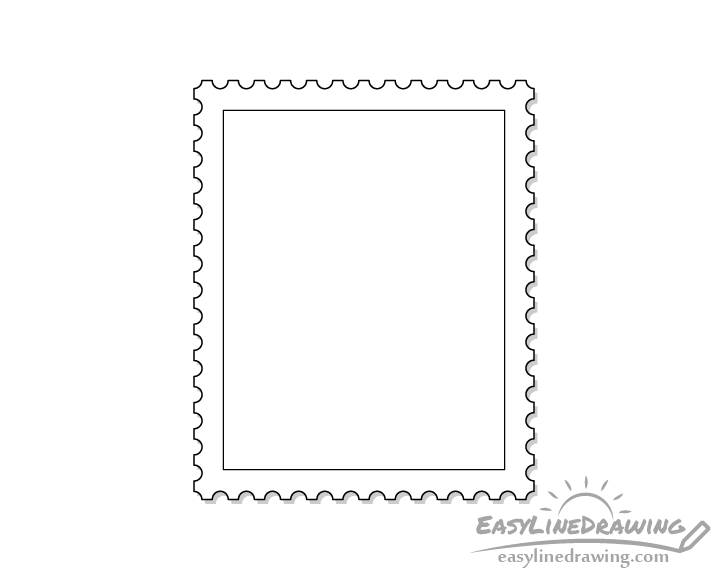
To make the drawing look a little less flat you can add a shadow to the bottom right of the stamp. An easy way to draw it is using a regular pencil. Give it’s visible parts the same shape as the main outline of the stamp.
After adding the shadow you should have a pretty much finished basic drawing of a blank stamp.
Step 6 – Add a Picture
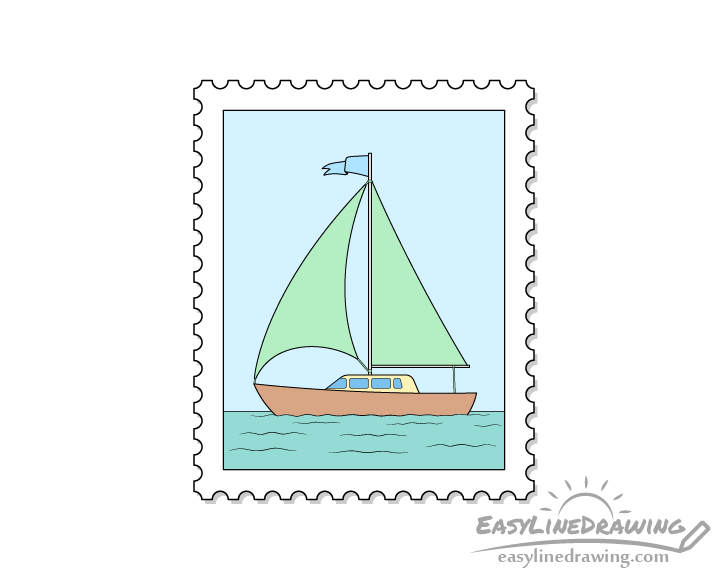
A blank stamp can of course look a bit boring so stamps often have some sort of a photo or picture on them. In this case it will have one of a boat from the following tutorial:
How to Draw A Boat Step by Step
You can refer to that if you want to add the boat to your drawing as well.
Conclusion
A postage stamp without a picture looks very plain. However, you can make it look a lot more interesting by adding a picture. In this example it was a boat but you can draw just about anything you like. For some ideas see the following:
- How to Draw an Airplane Step by Step
- How to Draw Blueberries Step by Step
- How to Draw a House Step by Step
- How to Draw an Anchor Step by Step
- How to Draw a Newspaper Step by Step

")


