How to Draw a Lamp Step by Step
This tutorial shows how to draw a table lamp with a lamp shade in six steps. It provides simple illustrated examples and quick instructions.
The lamp in this case has a fairly standard design with the parts that table lamps tend to generally have. You can see how these will be added step by step in the preview image above.
It’s recommended that you start the tutorial in pencil and make light lines that are easy to erase in case you need to make a correction. You can darken them later on with a black pen or marker.
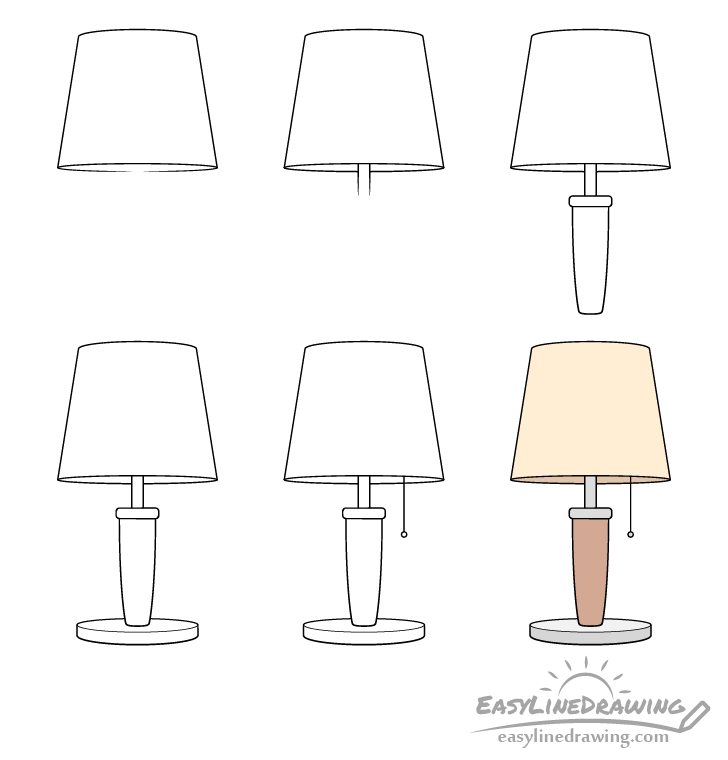
Step 1 – Draw the Lamp Shade
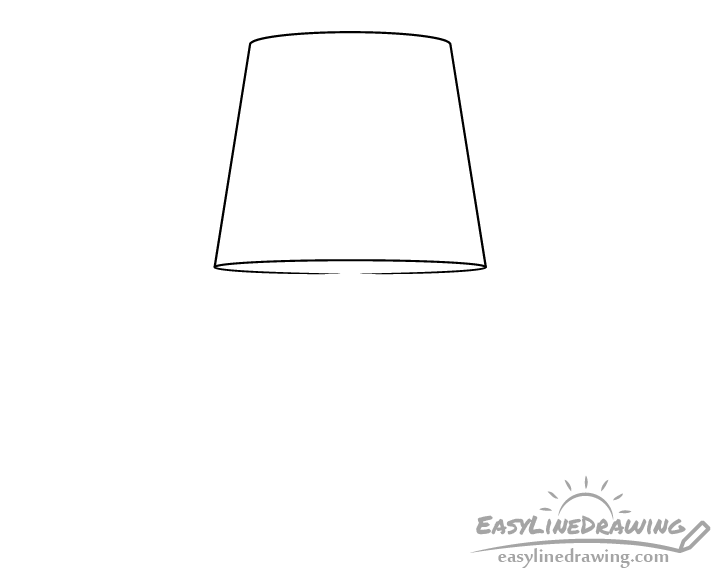
Begin by drawing the lamp shade. It’s shape should be like that of an upside down bucket with a wider bottom and narrower top. You can draw the top with a slight curve and the bottom as a very long an narrow oval. You can also leave or create (with an eraser) a little opening in the bottom part of the oval’s outlined for the pipe added in next step.
Optionally you can draw a straight vertical line to help you see if the lamp is symmetrical and that it’s not skewed to one side. If you wish to use this than you can erase it once all parts of the lamp are outlined.
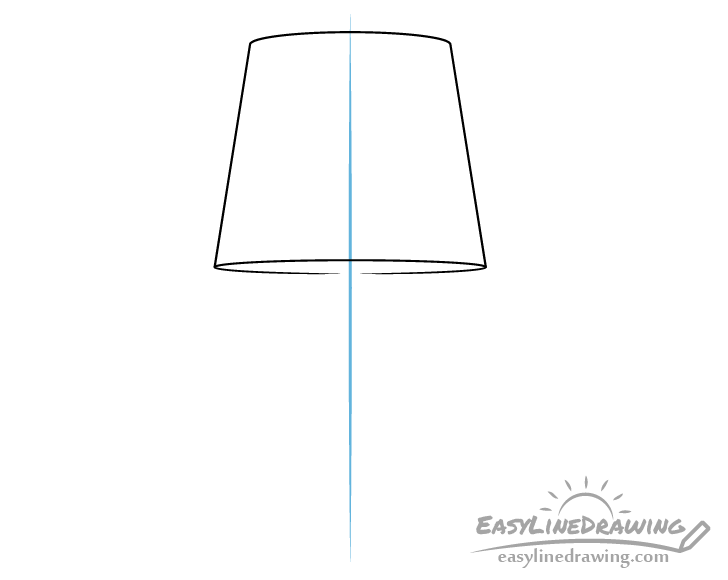
Step 2 – Draw the Pipe
For this simple step add the pipe. Draw it going down from the lamp shade with a pair of short straight lines.
Step 3 – Draw the Column
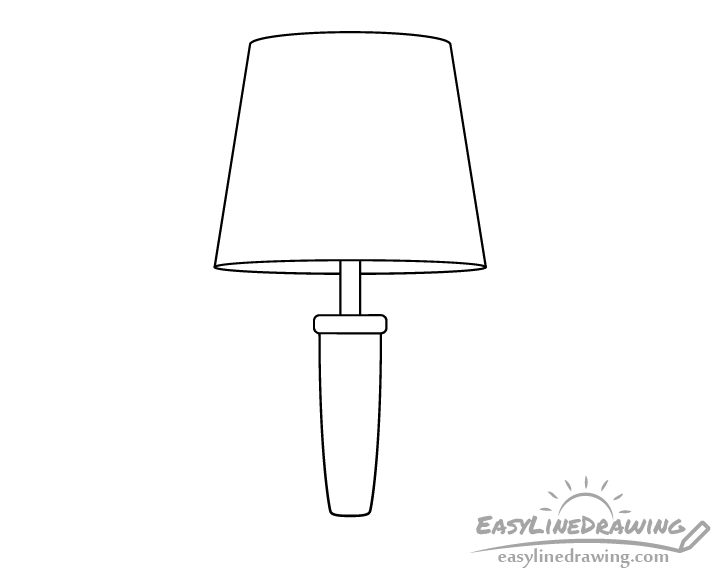
Draw the top of the column as a small rectangle with rounded corners and draw the section that comes after it with a pair of long curves for the sides and a small one for the bottom. Also make it wider towards the top and narrower towards the bottom.
Step 4 – Draw the Base
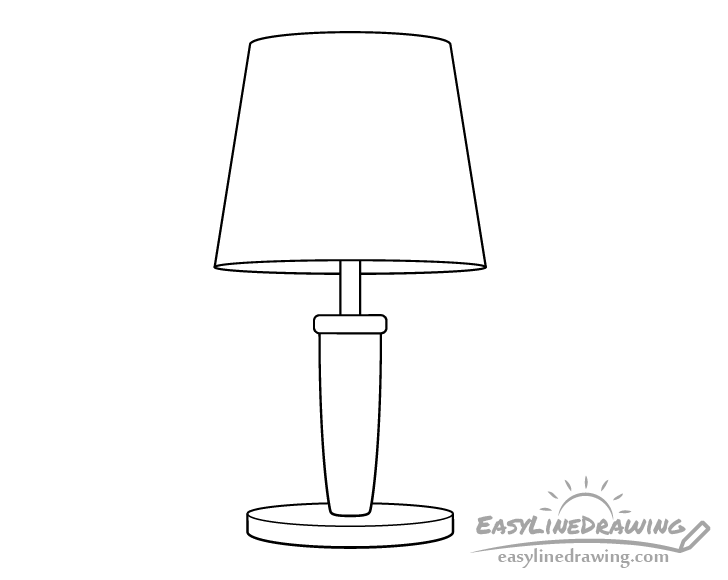
In this case the base of the lamp will be circular in shape but viewed at this angle it will look like an oval so you will want to draw it as shown in the example.
Step 5 – Draw the Switch & Finish the Line Drawing

Hanging down from the lamp shade draw a string with a little ball on the end. This will be the on/off pull switch.
Once done with the string confirm that you are happy with the way your drawing looks up to this point. If so, you can go ahead and trace over your lines with a black pen or marker. If you don’t have one around simply darken them with the pencil.
Step 6 – Color the Lamp
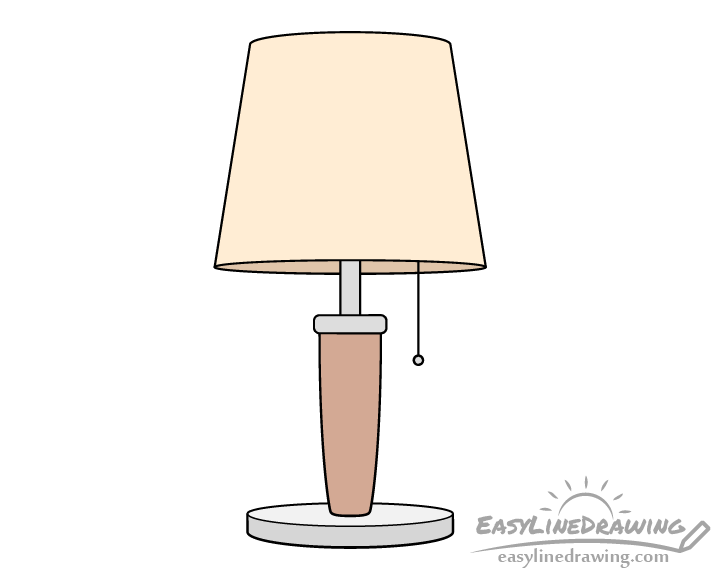
To get the lighter colors that are used in the example paints or colored pencils can be a good option.
In this case the lamp shade will be a light yellow/orange (as is very common for these). The pole, upper part of the column, the little ball and the base will be grey (to show that they are metallic) and the main part of the column will be brown.
You can make the inner part of the lamp shade slightly darker to show that the lamp is off (as in the example) or lighter if you want to show that the lamp is on.
Make upper side of the base slightly lighter than it’s side as usually light will tend come to from the top (either the lamp itself or other light source) and illuminate the area.
Conclusion
Table lamps come in many different varieties. As was mentioned at the start, this tutorial shows how to draw one with a fairly standard design and parts that these kind of items commonly have. Hopefully you’ve found the provided tips and example helpful.
For more similar tutorials also see the following:
- How to Draw a Light Bulb Step by Step
- How to Draw the Sun in Different Ways
- How to Draw Fire Step by Step

")


