How to Draw a Goldfish Step by Step
This tutorial shows how to draw a goldfish in six steps. It includes beginner friendly illustrated examples and basic instructions.
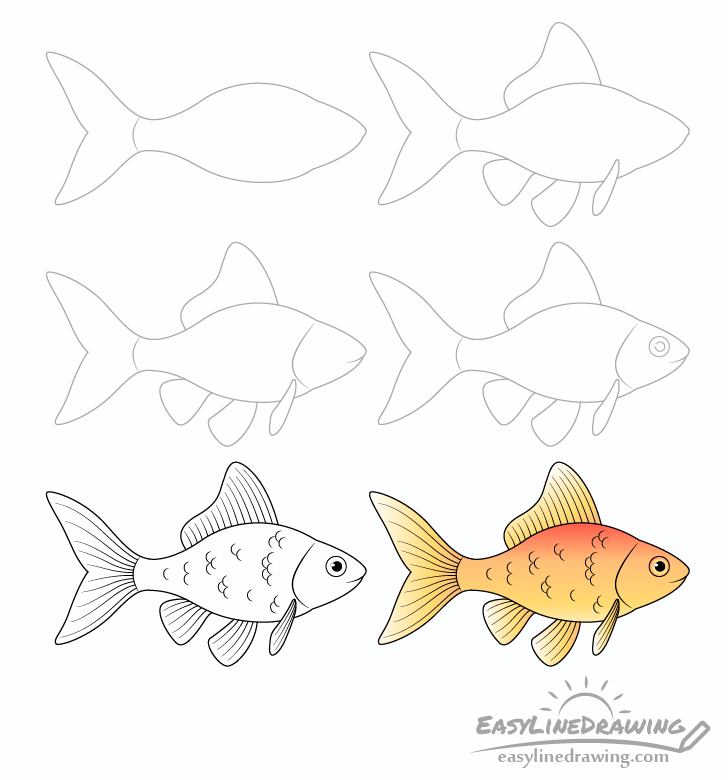
The goldfish has a good amount of detail but overall the tutorial is not too complicated. The simple breakdown of the drawing process should make it fairly easy to follow along. You can see a preview of the included steps in the image above.
Start in pencil and use it for most of the drawing stages. You can darken your lines before coloring (in step five). Before then try and keep them light as you will need to erase a small part of the drawing in step four. Light lines will also make it easier to fix mistakes.
Step 1 – Draw the Tail & Body of the Goldfish
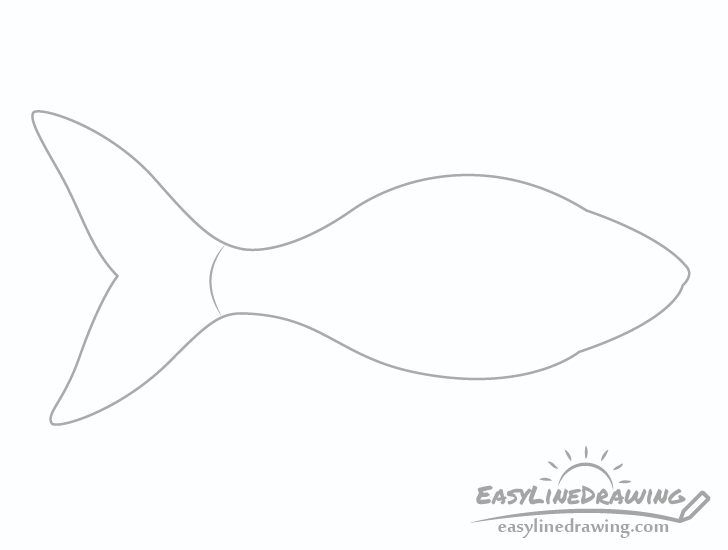
Start the drawing by outlining the shape of the goldfishes’ body and tail. Draw the body wider towards the middle and narrower towards the head and tail. Draw the tail curving backwards with a split in the middle. Finally add a little curve to separate the tail from the body.
Step 2 – Draw the Fins
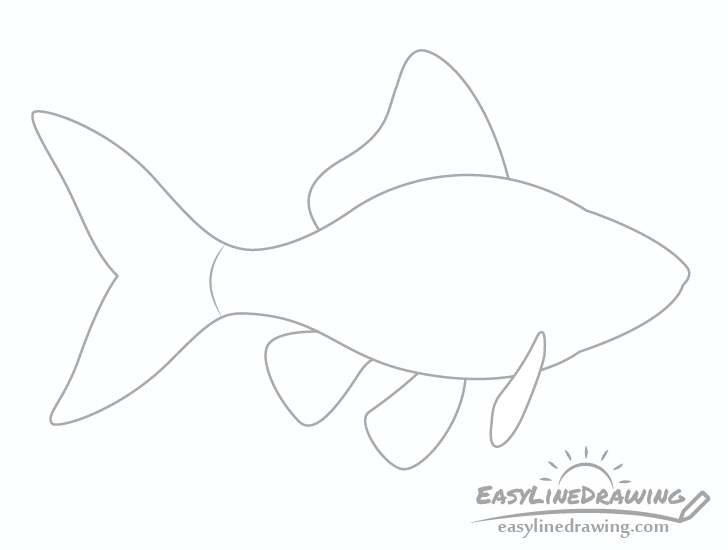
Draw the fins with the largest one at the top. It should be taller towards the the head and lower towards the tail. Afterwards add two fins on the bottom with one close to the tail and the other near the middle of the body. Finally add the last and smallest fin near the head and erase the part of the body that it overlaps.
Step 3 – Draw the Head & Mouth
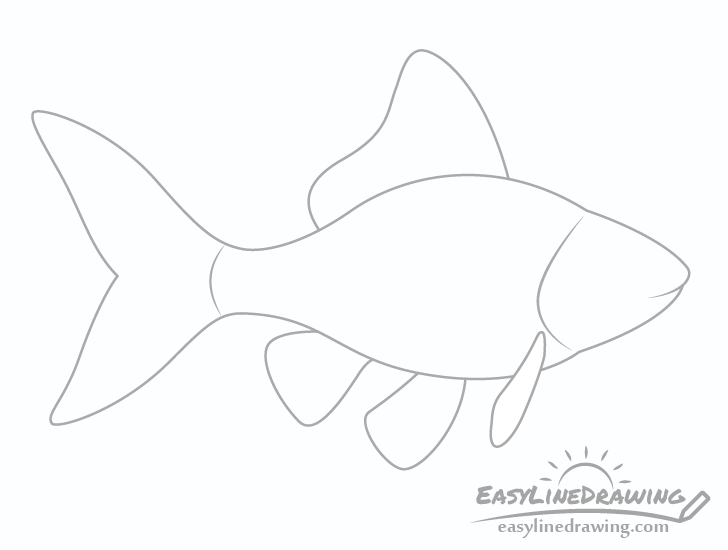
Add a curve going between the upper and lower parts of the head to better define it. Add another smaller curve near it’s tip to show the mouth.
Step 4 – Draw the Eye
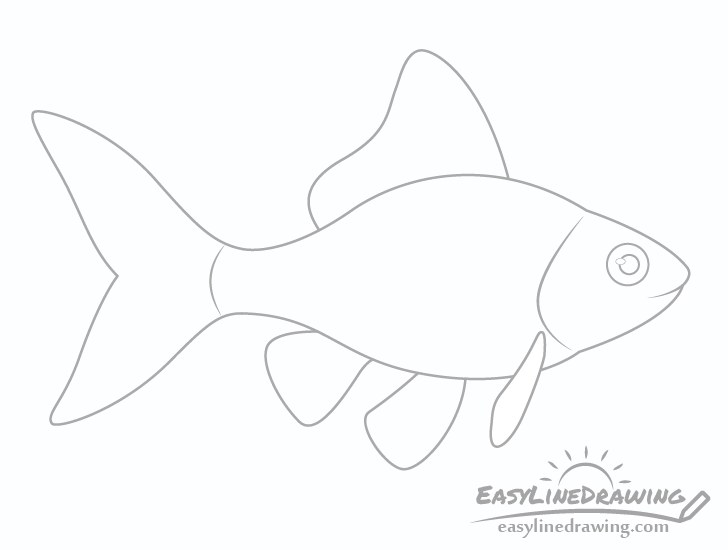
Make the eye round with another smaller round shape inside it for the iris. Slightly overlapping the iris add a small oval shaped highlight to help show that the eye is shiny and reflective.
Step 5 – Draw the Scales & Fin Details

For the smaller details add some lines along the fin and a hint of the scales. Draw the fin/tail lines in a way where they flow along the shapes of their respective parts (see example).
Add the scales as little half circles with some stacked together and a few on their own (again see example)
Once done with the above go over your lines with either a black pen/marker or darken them with the pencil. Afterwards also fill in the iris of the eye with either black or pencil shading.
Step 6 – Color the Goldfish
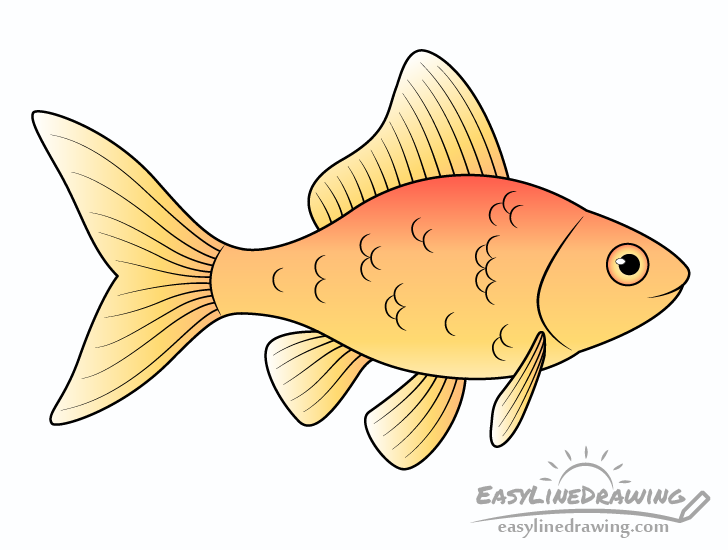
To color the goldfish use either paints or colored pencils. You can can make most of its body orange but add a gradient near the tips of the fins and tail that transitions to white (you can simply use the white of the paper). You can also do the same near its belly.
Add another gradients, this time red to its back getting lighter as it goes down. You can also add a tiny gradient inside the eye going from red to orange.
Conclusion
As mentioned at the start, the goldfish drawing used as the example has a good amount of detail, however, if you follow along with the steps it should not bee to complex. Hopefully you’ve found it easy to follow along.
For more similar tutorials also see the following:
- How to Draw a Dolphin Step by Step
- How to Draw a Penguin Step by Step
- How to Draw a Dog Step by Step
- How to Draw a Glass of Water Step by Step

")


